Thanks for watching & please subscribe!!
-------------------------------------------
[Honkai Impact 3rd] Myriad Abyss 26F at 67k° plus Mini-Guide Part 2 for V.Triumph - Duration: 5:17.
CC is added. Disable it if you're not interested on the mini-guide.
Hello everyone, welcome back for another mini-guide!
This will be a part 2 for my Valkyrie Triumph mini-guide.
If you haven't seen the part 1, the link is in the video description.
Part 1 is all about cancelling or preventing VT's QTE to trigger as well as the reason why you shouldn't use it.
Without further ado, let's get started. This mini-guide will be about attack rotations and a small gear talk when it comes to V.Triumph.
I'll start with my new attack rotation for DB-VR-VT team.
The reason why this gets an update is due to the availability of a new stigmata, Theresa Origins M.
Theresa Origins M is a free stigmata given from a previous event. It reduces weapon skill cooldown by 30%.
This stigmata is mandatory for Valkyrie Ranger on abyss. The better version is Siegfried M with -40% cooldown.
Pairing VR with Dimension Break is common for the extended freeze trick.
Casting Water Spirit Type-II's weapon skill followed by a switch to DB will create a freeze that lasts long thanks to the timelock provided by DB.
But now that Theresa Origins M can be used, this will let VR to quickly re-freeze the enemy much earlier so you can repeat the freeze+timelock combo w/o letting the enemy retaliate.
Yes, it simply means you can infinitely freeze the enemy as long as you can keep rotating the freeze and timelocks.
There is a catch though, for an enemy to take full duration of debuffs, they need to have 0 shields or simply, broken shields.
If you focus on the attack rotations too much and didn't notice the enemy shields, it might lead to a surprise attack so be very careful.
For example, a Honkai Crush with shields can end the freeze+timelock much earlier compared to the shieldless mobs.
And would attack you as soon as they are able to, and if you didn't notice it immediately, that can be fatal.
That's why if you noticed in this video, I always try to be cautious when attacking the debuffed enemies.
I would sometimes shorten my attacks to just 1-charged attack (2 swings) because the enemy might suddenly retaliate.
As for my full attack rotation, I now take advantage of Theresa Origins M.
As usual, start with VR's evasion skill to unleash a Blackhole. Followed by Type-II's weapon skill and then switching to DB for timelock.
I would then do a charged attack (2 swings) which is sometimes followed by another charged attack or just a normal tap to maximize the SP regen.
Now use Blade Field to extend the freeze debuff like how timelock extends debuffs. Followed by 2 charged attacks (4 swings).
Switch back to VR and do some normal taps to regenerate some SP. Once Type II can be used, cast it again and do 2-3 taps.
Switch to DB for timelock and this time you can use Tyr's weapon skill afterwards if you have the weapon for an extra burst.
FInally, switch back to VT to do 2 charged attacks again.
If you're confident that all enemies doesn't have shields, switch back to VR and freeze them again and restart the rotation.
That's the full attack rotation. If that's too long to remember, I'll post a summary in the pinned post below.
Now, unto the small gear talk.
There was a commenter on one of my other video, I'm referring to the 18F Myriad fail video.
This commenter said that Blood Dance is required for Himeko on Myriad.
I don't agree. The damage increase of Blood Dance and Balmung for a physical valk barely has any difference. Different application but both are strong enough.
The heal of Blood Dance is extremely negligible when it comes to Myriad and the only time I would agree that Blood Dance is better is when it comes to elemental Himeko valks.
Another thing this commenter said is that VR should be using a tank build. Basically a high HP pool build.
Again, I don't agree. It might work on lower temperatures but on high temperatures with really painful bleed, it just won't work, more so if it's Myriad.
Reason why is because having a high HP pool only decreases the effectiveness of heals and health packs.
What you need is good sustain in the form of either healing back the HP or mitigating the bleed damage from abyss.
This means that the best stigmata to drastically improve the survivability of the support, which is VR in this case is to use Lier Scarlet's 2-pc set effect.
A poorman's build would be to use Rowland T and Rinaldo B, the heals from these stigmatas would try to counter the bleed as much as possible.
Remember, increasing the max HP is simply just that, it has zero increase on your efficiency.
And that sums up this mini-guide! I hope you guys enjoyed~
-------------------------------------------
Guide to stan MONSTA X (몬스타엑스) - Shownu Version - Duration: 33:13. For more infomation >> Guide to stan MONSTA X (몬스타엑스) - Shownu Version - Duration: 33:13.
 -------------------------------------------
Lucerne Switzerland Travel Guide - Duration: 9:05. For more infomation >> Lucerne Switzerland Travel Guide - Duration: 9:05.
 -------------------------------------------
Hilarious Guide To Dog Breeds That Will Help You Choose Your Next Dog - Duration: 5:08.
Don't forget to LIKE and SUBSCRIBE ❤
-------------------------------------------
A Guide to Creative Flow · Getting into 'The Zone' · This Book Taught Me How - Duration: 16:59.
For me, getting into the zone is that moment where you kind of cease to exist
in your thinking self; you become whatever you're doing in that moment, and
whatever you're doing is all that you know. If you're drawing it's like there's
no you and the pen and the paper and 'the decision to put this here will result in
this', it all just comes together into a mutual relationship of all these
elements coming together and unfolding right in front of you. To put it simply,
the thing that sets it apart from any other normal drawing practice is that,
when you're in the zone there's no commentary, there's no more voice in your
head analyzing and making decisions and solving problems. When you're in the zone,
that voice stops- the concept of time stops- for however long, you're completely
suspended in just the act of creating. Not thinking, the movement of your hand
ebbs and flows naturally on the page and the marks you make seem to be making
themselves. It's like you're moving the pen as much as the pen is moving you. *mic drop?*
I'm painting a screenshot from Magnificent Seven by the way, and one of
you guys recommended it for its cinematography so I thought I would give
it a go. Definitely looks like a really good film. I thought I'd use this as an
opportunity to test out my landscape painting skills.
Being in the zone is such an incredible place to be and I've realized that it's
no different really to being in a state of meditation. The core concept of
meditation and mindfulness is to connect with the present moment and it's the
same here but instead of anchoring your thoughts on your breathing or your
physical self- your physical sensations- as you do with traditional meditation,
when you are entering the zone it's like we've unintentionally been meditating
the whole time, just focusing on the movement of our hand across the page or
just watching intently as art emerges on a page in front of you. And you might
have noticed recently that quite a few of my videos have shared this similar
tone of being present and mindful while creating; stepping out of the thinking
mind and into the being mind and focusing only on now. I've talked about
how it can help to notice and catch the negative thoughts of the inner critic
before they lead to discouragement and doubt, and also how being in the present
moment can just allow you to enjoy the process of making art regardless of the
end result just taking value in the journey, not just the destination so that
regardless of whether you make the biggest mistake you ever could, no art
practice could ever be seen as a failure.
And I can't pretend that I made this connection myself, of meditation and
being in the zone being pretty much the same thing, even though it does seem
quite obvious now. I've learned so much recently and really been able to change
my approach to creativity and art from what I've learnt from a book that- would
help if I had it to hand- one second-
This is mindfulness and the art of drawing by
Wendy Ann Greenaghl who is a writer and artist with 20 plus years of mindfulness
experience behind her, which she uses to teach people how to create freely,
conquer their inner critic, enjoy art and banish creative blocks. I got this
book as a late birthday present from my friend Linden and it's not big, it's not
wordy and overly complicated, it's quite a small book but it is so packed full of
inspiration and insight.
Also I like- and what I find that a lot of books like this lack is- that it's not
superficial or too out there and airy-fairy. It actually comes with a lot of
practical exercises, at least one or two for each point that the
author makes and so rather than just reading it in thinking 'that's a good
point' and then just moving on with your day, you're encouraged and guided-
sometimes even step-by-step, to take action and do something and put the
things that you've learned into action. You know, not just take the author's word
for it but actually experience it for yourself.
And getting into the zone is just one part of this book, it has so much to
learn in there because it's not just about the act of drawing. It teaches you
things that you can take into your daily life. So for example, there is a section
on self-portraits that goes into dealing with the scrutiny with which we look
ourselves and dealing with insecurities and self-judgment. It teaches you how to
look at the world through the eyes of an artist, see beauty and inspiration in the
most ordinary and everyday things and just travel through life with new
awareness to the things that are around you. Being able to travel through the
world with your eyes open rather than trapped in your head- which is what I
think most of us do most of the time. Just to give you a sense of what I'm talking about
I'll read a little bit just you can get an idea; 'Suddenly there are things to draw
everywhere. On our walk to work, red rose-hips droop on the tops of
straggling rose bushes in our neighbor's autumn gardens, on the bus the nobbled
nose of an old man or the thick shock of hair on a teenager's head leaves our
fingers itching for a notepad and pen. The gift of mindfulness- the gift of
awareness- is that in clearing our minds, pausing and coming into the present
moment, in simply being, we are offered the whole world and without all the
distractions of the thinking mind to get in the way ,we are able to open to it
more fully, more effortlessly than we ever have before...' And I'm not typically
into like far-out books that you know tell you to be 'one with your
truth' and 'open your heart to the universe'. There's one book in particular
that has come recommended a lot from a lot of people that I watch and listen to,
a self-help book that you really hear about a lot but I honestly- I'm not going
to name it- but I have never been so desperately underwhelmed by a book. I
just find that some of these things can be quite superficial because it's all
well and good to tell me that I need to change my life and these are the things
you need to do to change your life and how great your life will be once you've
changed it but you need to get into the nitty-gritty of how. For me anyway.
And the most valuable how that I learned in this book was how to get into
the zone. Although there are step-by-step instructions in here, it isn't a
step-by-step instructional book. It gives you the tools and information that you
might need to be able to take that forward into your own life and
translate it however it will work for you. So I'm just going to give you some
examples of how I've used it how I've interpreted it and how I fit it into my
art and creative process. So to start with, I have to set my intention. I have
to decide that I'm going to do a mindful drawing because not every drawing
practice is going to be a mindful one. There are times where I do have to be
more critical, if I'm doing studies for example. There are times where I
want to be open to the critical voice, the commentary and the questions I'm
gonna have to ask of myself while I'm doing a study, so I decide beforehand
that the first drawing practice of my day will be a mindful one. That way, no
matter how things go throughout the day creatively, I'll at least have that moment
to myself where I've been able to enjoy the process of creating art and I'll
have that always to look back on as a success for the day. Now the key thing
about the zone is just- to put it simply- keeping your attention on the process of
what you're doing. I don't know if that what's the simplest way to put it.
Basically, if you're thinking about what you are going to have for lunch later,
as I said in the inner critic video, notice it and being able to bring
yourself back to the present moment. So it's just you, your page, the pen, no
judgment, no commentary- good or bad- just an awareness of what's happening. And you
might find, especially at the beginning, that your mind wanders a lot. You might
find that every 10 seconds, you are realizing that you're not focusing on
what you're doing and having to bring yourself back into the present moment,
and that's fine -that's actually pretty good- because if you weren't being
mindful you wouldn't have been aware of the fact that your mind had wandered. So
it's just a case of making sure to try your best to notice the mind wandering
and bringing it back to centre. One really easy way to get a feel of having
your mind in the present moment is my
favorite practice in the book and that is to draw your hand with your eyes
closed. Which sounds a bit silly and maybe if your approach to art isn't to
explore and experiment and enjoy the ride, then maybe this isn't for you but
what I found when I tried this is that I really managed to connect with myself,
the feeling of my hand as it is in that moment, because you have to
feel it to draw it. And you're just letting that feeling almost like flow
through you onto the paper which you're also not looking at. You're just trusting
in yourself and the sensations and you're really focused on just those
things that you're doing you're focused on the feeling of your hand and the
movement of your other hand drawing.
And once you have an idea for how that feels, you can start drawing with your
eyes open and start not just seeing but really looking at what you're drawing.
And being able to hold that attention on what you're drawing and not get lost in
what you think it looks like or what you think it should look like, which I think
we all do a lot. When you are drawing from life and you realize that you
haven't even looked at what you're supposed to be drawing for like five
minutes because you've been caught up in creating the image of it that you think
it has. So I have turned my first drawing of the day almost into its own ritual. I
start by really carefully and intentionally choosing my tools, laying
them out and taking the time to reflect and really think about and feel grateful
for the things I have and the process behind them being made and each little
thing that goes into allowing me to create. Then I'll start a present, mindful
drawing practice and then I will finish off again with a reflection just a
moment to myself to thank myself for showing up, for getting something done
regardless of how it turned out, I have achieved something, and it's important to
recognize that every single time. All it really is is a positive, valuable time
with yourself and all it boils down to is focus. Focus leads to absorption
which leads to flow. And with that in mind, it doesn't really need to be any
more complicated than that. You don't have to follow a routine thinking;
'which part do I do next?'
It isn't a step-by-step path to a meditative state. Just keep it simple and
stay focused.
And with that in mind, you can really apply this mentality to all sorts of
things. If you're a writer you could be staying focused on the sensation of your
fingers on the keyboard or watching the cursor move and letters forming in its
wake, if you're a dancer, be present in the sensations of your body
moving and the cause of effect of this movement leading to sensations
over here.
To finish, there are six kind of truths of mindfulness that apply whether
you're meditating or drawing or writing. And the author in this book has adjusted
them slightly- these six kind of mantras have been around since I think
the book says like the 11th century, one of the leading mindfulness practitioners
I guess outlined these words - and the author has really loosely translated
those to fit in with drawing in mind. So instead of me going on about them, I
will just read them and they are; 'Let go of how you drew yesterday, let go of the
drawing you might do one day, really experience drawing as it is right now,
don't overthink it, don't force it, just relax, just draw.' So if you take anything
from this video, just let it be those six points. Write them down in the front page
of your sketchbook and remind yourself every day of those key things.
Let me know if this video is useful for you in any way, let me know if any of the
points resonated with you all and if you might be interested in adopting
mindfulness into your everyday life. I'll have a link below to this, it will
probably be an Amazon affiliate link which just means I will earn commission
if you do decide to buy it but obviously if you want to search for the book
independently you can do that; I will leave the title of it below. I might make
this a thing this 'this book taught me' make it a series. I am reading a lot more
at the moment and it would help to keep me accountable for my daily- daily??-
monthly drawing targets. So let me know if that's something you'd be interested
in. And if you like this kind of format of a long chatty video, I actually do
these every couple of weeks over on patreon but live so you get to chat and
we get to hang out while I'm doing it; you can ask questions, I also talk a
lot more about the process of my artwork and I talk about the things I am
listening to, reading, learning about, anything
I'm currently obsessed with...
'Vin Diesel as a Viking. Long hair, long beard. Father,
husband, warrior...'
Yeah if you are interested in that haven't have a look.
I'll have that link below. If it doesn't suit your fancy, that is fine. Otherwise,
thank you guys so much for watching and I will see you soon for the next video.
Bye!
-------------------------------------------
✅ OBS Studio - 2018 Ultimate Guide to Streaming to Twitch [BEST SETTINGS] - Duration: 15:18.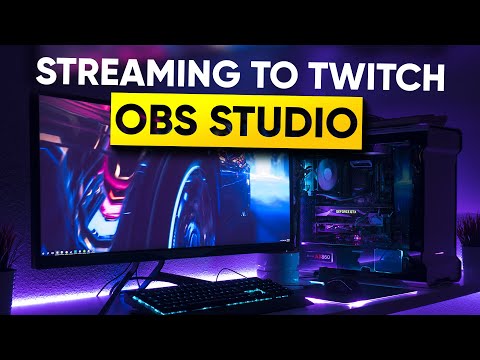
What's up guys welcome back to the
Gaming Careers YouTube channel where we
teach you how to livestream and how to
create content within the gaming niche.
Now, a little over a year ago when this
channel was super small, I created a
video teaching people how to live stream
on Twitch using OBS studio and
what settings you needed, and I didn't
know at the time but when I created the
video it instantly became my most
popular video and it has remained my
most popular video ever since. I think at
the time of recording its taught nearly
700,000 people how to stream to Twitch.
Now with that video being a little over
a year old it is also a little bit
outdated. It has a lot of relevant
information in it still, but it's a bit
outdated really for three main reasons.
Firstly OBS has had 20 new
versions since I made that video so
there's been lots of updates including a
nifty little auto-configuration wizard
to help get your settings right. Secondly
Twitch has heavily invested in their
infrastructure all around the world and
have updated their broadcasting
guidelines and what settings
you should use to stream since I created
the video and thirdly, graphics cards
companies like AMD and NVIDIA have also
heavily invested into developing chips
that they include with their newest
graphics cards that help take the
encoding process away from the CPU so
for those three reasons the guide is a
little outdated and I thought today I
would do a 2018 version. Now as with the
previous video, we will be going over the
key settings so things like which Twitch
server to stream to, what bitrate, what
framerate, what resolution, but we will be
using the OBS configuration wizard which
wasn't included when I made the last
video and that's going to help set up some
of our settings for us straightaway, so if
you're ready let's dive in!
So first things first, let's download and
install OBS studio by heading to the
website which I've included down in the
description below,
you'll just need to expand the
description to see it and I've also
included a link on-screen. Now once you
arrive at the website you need to choose
your operating system that you're going
to be installing for between Windows, Mac
or Linux. I'll be installing for Windows
but since OBS studio is multi-platform,
all the settings we cover in this video
are appropriate for the Mac and Linux
versions as well. Install the application
as you normally would and launch OBS
when installation has finished. When it
launches it should look something like
this. Now for those of you that are
completely new to OBS, this may look a
little bit hectic, but it's really just
made up of a few different sections.
Firstly up top this is the stream
preview, this shows exactly what OBS
studio is sending out over the Internet
to Twitch. Down in the bottom left you
have the scenes and sources sections.
Scenes are effectively just different
screens that you can switch to, to
display something different to your
viewers. Typically people will have
at least a game scene, a be right
back scene and maybe a starting soon
scene. Sources are individual elements
that you want to display in each scene,
so for example in our game scene we
might want to show the game, that's one
source, as well as the webcam, that's
another source and maybe a
recent subscriber and that's a third
source. In the middle at the bottom we
have the audio mixer, this is where we
can see and change the audio levels of
all the different audio sources. So for
example our desktop audio source or our
microphone source. To the right of that
we have the scene transitions which is
just basically a way of choosing how you
want the transition to show between two
scenes. Finally on the right in the
bottom you have some controls for
starting and stopping your stream or
recording, as well as getting into your
settings. Below that you also have some
little info panel showing you how long
you've been live for, how long you've
been recording for, as well as your CPU
usage and your frame rate. Before diving
straight into these settings and the
configuration wizard the first thing
that we want to do is set up our profile
and our scene collection. If you look up
at the top title bar here you will see
that we have profile untitled and scenes
untitled, and that is because we haven't
set up any profiles or scene collections
yet. OBS allows you to have
multiple different profiles each with
their own set of settings, which are
super useful if you are going to be
streaming to different accounts from
time to time. All we'll do here is we'll
rename the default one by going up to
profile and selecting rename. I'd
recommend naming this whatever your
channel name is and the streaming
platform, so it's easy to make sure you
have the right profile selected when
you're using OBS. So for me that's going
to be 'GamingCareers - Twitch' because
I'm going to be streaming using this
profile, my gaming careers Twitch
channel. OBS also allows you to have many
different scene collections each with
their own set of scenes and sources
inside. This is super useful if you're
going to be streaming different games
from time to time and you want to have a
different looking stream for each game.
Again we're just going to be selecting
scene collection, rename and rename it to
whatever makes sense for your stream. I'm
going to be naming mine 'Gaming Scenes'
because I also have collections for
podcasts and other shows that I do. Now
if we look back up at the top title bar
again you should see that we now have
our profile and scene selection set up
properly. In the previous video that I
recorded last year, at this point we had
to dive deep into the settings of OBS
and start testing our connection. Though
at some point in the last year, OBS added
the auto configuration wizard that aims
to test your computer and your internet
connection to Twitch or YouTube or
whatever platform you end up choosing,
with the aim of setting a lot of these
complex settings like bitrate, server
location, resolution and framerate for
you. Now although these settings that get
set may not be bang-on perfect they
certainly give you a very very good
starting point for your stream settings.
So to run the wizard we come up to tools
and select auto configuration wizard. A
new window will appear which will ask
you if you want to optimize your
settings for streaming with recording
being a secondary, or if you are just
optimizing for recording. Since this is
the ultimate guide to streaming with OBS,
I recommend that you guys choose the
first option and press next. The next
screen allows you to select your base
resolution or your canvas resolution and
your FPS preferences. Let's start with
the base resolution. This should be set
to the resolution that your game is
being run at, so if you're playing on a
1920x1080 monitor and you play your
game at that resolution also, then you
should select 1920x1080 here. It's
worth noting that this isn't necessarily
the same as the resolution that you will
eventually stream at, OBS may advise to
scale down your stream to something like
1280x720 but it's important to set it
here to what your monitor and more
importantly what your game resolution is.
Since my monitor is 1440p I will be
selecting that resolution here. The
second option is your frames per second
or FPS and that allows you to choose a
number of different options as to what
you'd like to stream at. You can select
some hard values like 30 and 60 or
there's also these other two preference
based options. The first one 'either 30 or
60 but prefers 60 when possible', this is
for people that want to prioritize
getting 60 frames per second over their
resolution. Whereas the 'either 60 or 30
but prefer higher resolution', this is for
people that want to prioritize getting a
higher resolution over the 60 frames per
second framerate. So which of these
options should you actually choose, well
that's completely up to you, do you want
the smoothest possible video or the
highest detailed resolution. For fast
paced games such as first-person
shooters or racing games, I would
recommend prioritizing 60 FPS, but feel
free to choose either option.
Just remember the OBS wizard will only
recommend 60 fps or the higher resolution
if it deems your computer and your
connection are good enough to be able to
handle it. Once you've decided you can
click next to move on to the stream
information step. This is where you're
going to be choosing which platform you
wish to stream to as well as entering
your stream key. Firstly stream type
allows you to choose if you are going to
be using a streaming service or if you
want to be using a custom streaming
server. Since we're streaming to
Twitch here I will be choosing streaming
service. Next we'll get a drop-down of
all the different current services that
OBS support, so Twitch, YouTube, Mixer,
Facebook are all in there and we're going
to be selecting Twitch. Next we need to
enter our stream key. So this is the
private key that we can get from our
Twitch account and it's the only thing
required by OBS to allow you to stream
to that Twitch account, so this is a
private key that should be kept private.
To get the key, you can click the little
link in OBS to open up your web browser
to the right page where the stream key
is shown. If you aren't already logged
into Twitch on your browser then you'll
obviously need to log in before you can
get your stream key. You can also always
access your stream key by going to the
Twitch website, then go into your
dashboard, clicking channel
under settings and then finally clicking
on your stream key. Twitch reiterates
that you shouldn't be sharing this key
with anybody else, obviously I'm going to
be showing my key here in this video but
there's also an option to reset your key
which I'll be clicking as soon as I
finish making this video. So last time I
did this, everyone was commenting you
know you said you couldn't show your key
and you showed your key, but obviously I
just reset it after I've made a video.
Select the whole stream key and copy it,
head back to OBS and then paste it into
the stream key box. The next two boxes
should usually be left checked. The first
one which is 'prefer Hardware encoding',
means that OBS will try and use the GPUs
dedicated encoder chip if it has one,
which is usually preferable as it frees
up your CPU which should in theory help
reduce stream issues. However hardware
encoding does also usually result in a
lower quality encoding for streaming. I
personally would recommend using the
hardware encoding if you can and leaving
this box checked, obviously if you're not
sure whether or not your graphics card
has the encoding chip, you can leave this
box checked and OBS will check for you,
but actually the ideal setup would be
for you to test both CPU encoding and
GPU encoding on your stream and seeing
which one you think makes better results
in terms of quality as well as in terms
of the system performance impact. The
second box which is 'estimate bitrate
with a bandwidth test', this just means
that OBS will perform a test to some
local Twitch service to try and find an
ideal bitrate that you can stream at.
Once you're happy you can click next and
OBS will begin to start performing its
configuration tests. What it is doing is
streaming some random data at various
different resolutions, bit rates and
frame rates to Twitch servers without
actually going live to try and work out
what your system and your connection is
capable of. This test is pretty quick,
takes less than a minute and when it is
complete you should get a window showing
the test results. Take a look at all the
different settings that OBS has
recommended, what resolution the output
stream will be at as well as what
bitrate and what FPS. Clicking 'Apply
Settings' will mean that OBS will then
apply these settings to the current
profile. I just want to reiterate
something and make it really clear that
this is OBS's estimate as to what the
ideal settings for your setup would be.
Most people at some point in their
streaming career are going to have to jump
into the settings window and change one
or more of these values
to keep things stable. All of these
settings that have been applied can be
found if you click the Settings button
here on the right and look in the
relevant tab. The stream tab is where
your streaming service and stream key are.
The output tab is where the video
bitrate, the encoder and the recording
options are, and finally the video tab is
where the output resolution and FPS
options are. There's also some tabs for
general, audio hotkeys and advanced for
you to have a look at if your heart so
desires.
The final thing we need to do before we
start streaming is to add a scene and a
source. Let's start by renaming this
default scene called 'scene', by
right-clicking it and choosing rename.
I'm going to call this scene game since
it's going to be the scene that has my
gameplay in. Next move across to the
sources panel and click the plus icon.
This shows all the different types of
sources that you can add to each scene.
Things like text, image overlays, webcams,
browser windows and all sorts of other
things. To keep things super simple for
this video we're just going to be
selecting game capture since we want to
start by capturing our game. Make sure
that you have your game running at the
same time as setting this up so that we
can make sure that it's captured
properly. Name it whatever you want, it
doesn't actually matter what you name it
but it helps to identify each source.
Once you're further on in setting
up your stream you have many
different sources in each scene, it's
going to really help if you have them
named properly. I'm actually going to be
leaving mine as game capture since this
is always going to be the source that
captures my game, no matter if I change
game. Once the game capture window has
opened, it gives you a number of
different options for its mode. If you
always play your games in full-screen
rather than something like windowed or
borderless, you should be able to leave
the mode on 'capture any fullscreen
application', this just means that OBS is
always going to find the full screen
application and choose to use that as
its source. However for some games that
doesn't always work or maybe you're
running your games in a window or a
borderless mode, in which case change the
mode to capture a specific window and
then select the correct window you want
to capture from the next drop-down.
Hopefully you should then see the screen
preview update with your captured game
and that is basically the very
beginnings of building your stream
layout and design. At this point I'd love
to recommend you watch my video on
adding more sources to OBS,
it covers adding games, webcams, overlays
and text as well as covering various
issues that
some game capture methods super from such
as the black screen bug. I've linked the
video down in the description once again,
but also you should be able to click a
little link in the top right corner. I
also have a whole playlist on how to do
various things on OBS, if you're new to
this channel it's definitely worth
subscribing and having a look around all
the cool things that we've learned how
to do for your OBS studio stream. Thanks
so much for watching and hopefully you
have enjoyed this 2018 version of how to
stream to Twitch. Another video that I'm
just going to recommend if you're having
any issues with your stream, I do have a
video on Twitch Inspector, which is a way
of being able to analyze what's going
wrong with your stream and helping
decide what settings to change, so
definitely check out that video. Again
down in the description if you're having
any issues. It's really interesting for
me how much easier this has become.
It's become so much easier to setup your
stream with things like the auto
configuration wizard and there's so much
more detailed information that Twitch is
actually giving out so it's nowhere near
as long of a setup process and hopefully
you've been able to follow along and
have something that you're happy with.
Finally I want to finish just by
thanking again my Patrons. They're
supporting the creation of these videos
for the whole of the Gaming Careers
community so I'd like to say a massive
thanks to these people here for
supporting the channel. If you
haven't yet joined our Discord, we have
over 100 members now all in our
discord channel, talking about how to
improve streams and networking and all
these kind of things as well as just the
general jokes and memes, so if
you haven't joined the discord yet
please do. If you would like to also
become a Patron I would really love it
if you would go and check out my Patreon
page, again linked in the description
below,
there's loads of perks that you can sign
up for such as getting
shoutouts in this video but also things
like stream promotion in discord or
hosted on my website as well as various
other things that I'm offering, so please
do go and have a look at my Patreon and
consider supporting if you have found
these guides helpful. Thank you so much
for watching guys and I will see
subscribers in the next video. Peace!
-------------------------------------------
Tutorial: How to make a video with photos and music (slideshow guide) - Duration: 11:03.
Hey!
Daria here, and I'm thrilled to see you on the Movavi channel.
My colleague Roman has recently returned from a trip with hundreds of photos from Germany
and Portugal.
To look through all of them would take at least 2 hours.
But Roman had mercy on us; he chose just the best moments and made this highlight reel
of photos in just a few minutes.
I don't know about you, but when for me, I just love reminiscing about past trips.
And to keep those memories alive, I sneak a look at my photo archives every now and then.
There's amazing great new way give your memories a new lease on life: make a stunning
slideshow with animation, titles, stickers and atmospheric transitions.
It's a great alternative to a paper photo album for capturing memorable moments in your
life as well as sharing them with your nearest and dearest.
Also, a video made of photographs can easily become a unique gift for a birthday, graduation
or anniversary.
I'm going to try and make a slideshow like Roman's.
Movavi Video Editor will help me out with that.
I've got a feeling mine won't be any worse.
Well, off we go!
Step 1.
Launch the Movavi Video Editor
I use Movavi Video Editor Plus.
You can download the program and try it for free right now by clicking on the link we've
left for you in the description for this video.
Step 2.
Download the photos you want to use in the slideshow into the program
Click "Create a montage in easy mode".
It will automatically take you to the Montage Wizard where you can not only edit complete
videos but is also eminently suitable for creating a slideshow.
Images can be simply dragged into the program window, or you can add files individually
by clicking on the "Files" button.
You can even add a whole folder!
That's exactly what I'm going to do.
At this stage it's really easy to sequence your photos for the slideshow.
Just click on each image and place it in the required position.
Extra photos can be just as easily removed so you don't overload the slideshow.
Step 3.
Select the background music.
Click "Next" to go to the "Music" tab.
Let the rhythm of the music add some pizzazz!
Cuz that's what makes a video of photographs different from just flicking through photos.
Feel free to upload any music you want, or choose some from the built-in program collection.
This one is a perfect match!
If you want to make a slideshow with no background music, don't choose anything, just click
on the "Next" button.
After you've chosen the music, we need to set the slideshow duration.
You can make your video shorter or longer; it will influence the speed which your photos
are displayed.
The program itself will take care of changing the photos in sync with the beat, rather than
randomly.
Alternatively, you could just click "fit to music length" to ensure that the slideshow
fits the selected length of the music.
In the preview window, you can see right away how your slideshow turns out, and go back
to the previous step if you want to change the photos or music.
I guess it already looks fine the way it is!
You can save the slideshow at this very moment and send the video file to your grandmother
or upload it to YouTube.
But we're going to go beyond that!
I just can't wait to make this video even more vibrant and colourful!
Step 4.
Move on to the full version
Click the "Continue editing" button, if you want to make your slideshow even more dynamic.
This takes you to the full version of the video editor, and your complete slideshow
automatically appears on the timeline.
Photos and video clips generally have a different aspect ratio.
As we're making a video, we recommend choosing the video aspect ratio in the project settings
to avoid those ugly black borders.
Let's set the method called "Crop", with 1920x1080 resolution for HD-quality output.
Step 5.
Set transitions between your slides
At this stage, different transitions can be added to bring some variety to our slideshow.
To do this, we'll use the "Transitions" tab on the left navigation bar.
I like this classical approach.
Let's grab it.
You can apply any transitions; there are plenty to choose from in the built-in collection
that comes with the program.
If you like consistency, you can apply the same transition to all the slides; just right
mouse click on the one you like and choose "Add to all clips".
Step 6.
Add titles and labels
Click on the "Titles" tab, choose the
option you prefer, and drag it to the timeline by placing it over the appropriate slide.
Double click on the slide with titles on the timeline and enter the text you want.
The colour, size and font of the text can be changed.
To save the changes, click on the "Apply" button in the upper right corner.
I'll apply the titles from the "Intros" section to show the names of the countries
which Roman has been to on the trip.
Also, we'll use some additional titles to apply a few comments.
Just like that.
Finally, we'll use this animation title for the final screen of our slideshow.
Step 7.
Apply filters
Hit the "Filters" button and choose a filter from the categories presented.
Let's drag your preferred filter to the target slide . Do you want to try a different
filter?
Click on the star symbol in the corner of the slide and select "remove".
Let's try another filter.
How about the "camera shake" effect?
That's pretty trendy right now.
I'm also in love with the "Pop-art 4 tiles" filter.
Looks stylish, indeed.
We're a long way from a boring photo album now!
Step 8.
Add stickers and animation.
Choose the "Stickers" tab.
It's a must-have for slideshows!
Just click on the sticker from an appropriate category and drag it on the timeline by placing
it over the target slide.
You can modify the size and position in the preview window.
When it comes to food, there are some great stickers.
Let's add this one.
From the "Travel" section, we'll take a backpack.
In the picture with the married couple, we'll take a heart from the "Objects" section
– maybe more than one.
To animate the object, turn to the "Animation" tab.
Choose a sticker on the timeline and click the "Add animation" button.
With the help of this function, we can make an object or image move the way we want to.
I'd like this one to fly.
That's what I'll do.
We need to set the initial dot where the objects start moving and the final one where the objects
stop.
It's possible to change the object's position, as well as the size and turn angle.
You could make the hearts grow and twist slightly.
The closer the initial and final dots are, the faster the objects will move.
Step 9.
Save the complete photo-video
Let's click the "Export" button and choose the "Saved Video File" tab if you
want to watch the video on your computer in the future.
To play it on a mobile devices, choose that tab; it contains ready-made export settings
to make it easier to watch on iPhones, Android devices, and more.
Now we need to choose the right format and quality for the video, the folder it will
be saved to Click "Start" and hey presto - our video is ready!
Hurray!
It turned out to be just as good as Roman's!
This video can be uploaded on the YouTube and shared with everyone straight away.
In Movavi Video Editor Plus there are plenty of other features like Chroma key, the censorship
effect, the clip stabilization tool, and many many more!
And we want you to experience them for yourself!
The link to the trial version of the program is in the description.
So, what's up?
Did you start the process of making your own video from photos?
I'm looking forward to seeing it!
Leave us a link in the comments.
Do you want to learn more about how to edit photographs before turning them into a slideshow?
I recommend you watch some of our episodes on Movavi Photo Editor.
If you enjoyed this tutorial, like the video.
I will be super happy!
If you're not yet a subscriber to our channel, it's about time you did it!
See you in a bit!
Can't wait for our next meeting!
Bye!
-------------------------------------------
Part 4 A Guide for Laboratory Systems Management: LIMS/LIS, ELN, SDMS, IT & Education - Duration: 44:00.
Hello & Welcome, everyone!
Thank you for joining us for today's webinar, hosted by the LiMSforum.
My name is Dinah Ramirez and I'm your Moderator for today's webinar.
Today's Webinar "A Guide for Laboratory Systems Management is PART 4 of a webinar
series that's been presented by Joe Liscouski!
Today we'll be focusing on LIMS, ELNs, SDMS, IT & Education.
If you're joining us for the first time in the series, Joe is an experienced laboratory
automation/computing professional with over forty years experience in the field, including:
-the design and development of automation systems
- LIMS - robotics and data interchange standards
- and consults on the use of computing in lab work.
We're excited to have Joe with us here again for Part 4 in his series, so let's check-in
with Joe and we'll get started!
Alright, Joe, thanks for joining us!
The floor is yours.
Thanks and welcome to the fourth session in this series.
We'll be continuing to look at the factors in making a choice of central database systems,
the added concerns multi-laboratory environments can bring, and the role that information technology
support groups have in this process.
As we've noted in these webinars, this companion book will provide useful background information
on the technologies, support, and other factors that can impact your ability to effectively
use these systems.
It should prove to be a useful reference as the webinars get into more technical details.
Those details will become more apparent in this session, and I will be making references
to sections of the book for more information.
I'll also provide additional reference material at the end of this webinar.
The previous sessions have introduced the major
systems in laboratory informatics and looked at how the return on investment can be measured
evaluated.
In the last session, webinar 3, we began looking at the points that need to be considered when
choosing between a LIMS, ELN, or SDMS for a single lab, plus the documentation needed
to support those decisions.
At this point we are assuming that you've addressed the issue of what type of central
database system you are going to use as a target: LIMS, ELN, SDMS, or a combination
of them.
At this point we aren't looking at specific products, but rather product characteristics
that fit your workflow: large scale repetitive testing or laboratory work diary.
Our initial focus on the central database system as a starting point is based on a simple
premise: Multiple uncoordinated workflows from isolated workstations will leave you
with multiple sources of data and information that will at some point have to be integrated.
Without that integration, comprehensive lab-wide or even technique-wide data analysis and evaluation
will suffer significantly.
You are better off addressing this need as early as you can in your lab's life.
We looked at these points with regard to a single laboratory…
and now we're going to consider the points that might arise in a multi-laboratory environment,
differing implementation structures, and the role of IT support in this work.
Multiple lab situations can arise for a number of reasons: you may be working at a research
complex, or for a company or organization that has multiple campuses.
One laboratory may do testing in support of research and also develop test methods that
will be put to use in quality control labs.
The questions that we want to address are: - can multiple labs benefit from common product usage
and can they agree on one or more product characteristics that can lead them
to successfully choosing and implementing working systems?
The benefits of focusing on a single product or a small set of products include reduced
purchase costs.
Some informatics systems permit multiple independent datasets to run concurrently; you have the
ability to support several labs with a single license.
If you are buying software for several labs, you have better bargaining power.
The other benefits derive from support costs.
If the number of sites you are working with is large enough, the vendor may offer special
support considerations.
If your IT group is supporting your software, they will have an easier time supporting one
product set, particularly if it involves development work.
In addition, the learning curve for lab personnel will be smoother, and if people transfer between
departments, they will have access to systems that they are already familiar with.
Similarly, meeting the needs of regulatory compliance will be simplified.
All of this works if you don't have to compromise on meeting your laboratories needs.
You don't want to have to sacrifice important features or force-fit LIMS functionality into
an ELN.
However, products that support both workflows would be useful, particularly if needs evolve
one way or the other.
When we are dealing with systems like these, there are additional considerations that have
to be taken into account.
Among them are system backups and archives.
Both are designed to address an important problem: data loss and retrieval.
Everything we've covered so far has been concerned with getting data and information.
It has to be protected from loss as well.
System crash, there are floods, storms, electrical failures, and malware to take into account.
Protection against data loss includes backups and archives.
Backup provides short-term insurance against system failure and data loss.
They are copies, essentially a snapshot, of the entire system or major segments of it
depending on your policies.
Different portions of the system may be backed up at different frequencies.
A backup can be used to restore all or part of a system.
Archives are another form of backup and will include both actively used documents and historical
information organized so that it is easily searched and has the ability to retrieve the
contents, including older versions of documents.
Those have to be backed up as well.
This is a subject that could warrant a session of its own.
I mention it here because of the impact of these activities on IT support and how that
can be affected by the choices made in both product selection and use by multiple labs.
In case you are wondering, I have my work backed up or archived three different ways
including remote archives.
The backup is a current snapshot of the disk drives on the system.
The archives contain historical information including current and older versions of files.
A little paranoia goes a long way.
Why is this important to you?
The shift from paper-based systems to electronic media offers something you didn't have before:
protection against loss of laboratory work, plus the ability to easily re-organize it
and distribute it for use elsewhere.
It also raises a concern that you didn't have before: security against electronic theft
and malicious behavior including ransom-ware and other problems.
We are beginning to define the roles of an outside organization in laboratory work, that
of IT support.
One important characteristic of LIMS and ELNs designed for laboratory work is the ability
to connect instruments and data systems either directly to the database systems or through
an intermediate system like an SDMS.
This is an important selling point for these systems and a key component of improving productivity
and Return On Investment.
Instrument data can be automatically entered into the database and work lists can be sent
from the data-system to instrument/experiment workstations.
How significant these points are, and how they fit into your needs is going be a consideration
in the next few slides.
What we will be covering will have a direct bearing on multi-lab systems support and suitability.
How data and information are collected and moved around the laboratory, between data
sources and destinations, will have some bearing on how you prepare for centralized database
systems and where they are located.
The three primary modes of collection and communications are shown on the screen:
analog data capture with digital controls, serial communications, and Ethernet compliant systems.
These can range from instrument-computer combinations that are one-to-one or many-instruments-to-one-computer,
to devices with built in communications protocols and connectors.
We'll look at the implications for centralized database systems in the next few slides.
The output of an analog device can go to a meter, chart-recorder, or most commonly today,
a computer system.
The instrument (data source) has to be close to the computer to avoid cabling problems
as well as noise elimination.
Normally the computer will provide instrument control (including an autosampler) via digital
switches through a digital I/O card.
The computer provides the analysis of the data, with reporting and communications (usually
via Ethernet or WiFi) to an SDMS system or LIMS/LIS, ELN.
The distance between the instrument computer workstation and the instrument is dependent
on the nature of the control and data signals, acquisition speed, and the options for data
conversion over intermediate networked devices.
High speed data collection and the use of hyphenated techniques argue for close physical
proximity to facilitate acquisition and control.
Low speed devices such as chromatographs would permit longer separations particularly if
care was taken for noise-rejection in cabling.
Since the computer provides data storage and communications buffering, the proximity of
the computer to the centralized data system isn't a problem as long as provision for
fault tolerance to the loss of a network connection is built in.
This becomes more of an issue as the database computer becomes more physically distant from
the instrument system due to the potential for delays and downtime.
The loss of a connection will impact information transfer in both directions; test results
in one direction, work lists in the other.
Some common laboratory devices are really packages of a measuring instrument and computer
control system.
The instrument provides the analog signal and the computer converts it into digital
form and provides serial or Ethernet communications protocols to computer system.
pH meters and balances, are among the devices that fall into this type of instrumentation.
These devices are usually designed to work in two possible modes: front panel controls
operated by a person, and programmable modes that depend on instructions from computers.
Front panel operations are controlled by the analysts needs; take a measurement, transmit
it, etc.
The back-panel command structure is a simple command-and-reply sequence.
For example a balance may be told to record a weight and send it back to a computer.
This requires an active connection, if there is a delay or either the instrument or computer
goes off-line, nothing happens.
LIMS, ELNs, and laboratory execution systems usually have facilities to connect these devices
to a computer and controlling them.
A Laboratory Execution System for example,
may interact with a balance by instructing the analyst to place something on the balance
pan, press a button and then the software records the weight in its data set, ready
to be used in the step of the process.
LIMS and ELNs have similar functions.
If the connection between the software system and device drops out, nothing will happen
and the analyst will have to revert to manual front-panel operations, entering the information
into the database later.
When we talk about connecting instrument to centralized database systems, we aren't
talking about analog or digital interfaces.
What we are looking at is communications between computer systems, exchanging files or serial
data.
Even in those cases, serial communications is best done with the use of a local (to the
lab) intermediate computer.
Connecting instruments, really means connecting the computer systems that are attached to
instruments and transferring files, or if data exchange standards are in place, exchanging
messages.
The problem with serial data is twofold: first there is the lack of an error free communications
protocol with error detection and correction, and, second, considering the previous examples,
there is the possibility of delays in transmission resulting in problems carrying out lab tasks.
It is easier to let a local computer handle the instrument responses and package the resulting
information in a file transmitted over networks.
Fundamentally, time critical, fast response tasks should be serviced by local-to-the-lab
computers.
This is part of the planning needed in laying out lab networks.
When files are transmitted by an instrument workstation to a LIMS, ELN, LES or SDMS, they
are received and analyzed to extract the necessary information.
The information is then entered into the database system.
The words "interfacing" and "communications" are not synonyms.
They represent different technologies, and we have to be careful how they are applied
to laboratory work.
It's important to understand the distinction between the "instrument" and the "data
system".
We don't normally interface instruments to LIMS/ELNs.
The interfacing is done through a computer system that communicates to the LIMS/ELNs.
We'll go into instrument interfacing and data systems in more detail in a later session,
it is very important to the design of your labs technology.
The need for a distinction between "interfacing" and "communications" will begin to become
clear in the next few slides.
This is a simple situation: one lab, one system.
With this arrangement the lab has complete flexibility in connecting instrumentation
to the LIMS or ELN, as well as configuring the database to meet their needs.
If specialized programming is needed to support an instrument, the lab has the freedom to
do so.
All of the instrument types in the previous slides could be supported.
One consideration in particular is worth noting: commercial data systems have a library of
software available to support instrumentation and make instrument-computer connections easier.
What happens if your device isn't supported.
If it is a low cost device, it might be far easier and less costly to replace with one
that is.
If not, find something similar and modify the software.
Otherwise you have an add-on project.
Instrument support requirements should be part of the user requirements.
Software modifications are an IT issue.
Until the advent of high-speed networks, this was the typical laboratory system configuration.
IT would be responsible for hardware support, operating systems, and infrastructure, as
well as system backup.
The support for the lab application software might come from corporate IT, but might also
be a lab function or contracted to a 3rd party.
The multiple lab variation is just a repeat configuration for each lab.
With this arrangement the labs retain complete flexibility in connecting instrumentation
to the LIMS or ELN, as well as configuring the database to meet their needs.
If specialized programming is needed to support an instrument, the lab has the freedom to
do so.
If different labs have similar interconnection needs, the development work done for one lab
can be repeated elsewhere.
This is one clear benefit for standardizing on product sets as long as it doesn't compromise
the labs work.
This situation could be replicated for a number of labs based on the same products, each lab
having full independence.
IT support would have to manage multiple computer systems dealing with support, updates, and
so on.
Each system would be individually backed up and the data system archived, as noted earlier
this could be done automatically.
This puts a considerable burden on IT staff, which could be mitigated by automated backup
procedures.
Backup and archiving facilities would have to be incorporated into the user requirements
along with the policies for backup frequency and archiving of backups.
There would also have to be periodic testing of the backups and archives to make sure the
process is working.
The next variation provides support benefits, but starts putting some complexity into the
system.
In this arrangement we have 3 independent labs sharing access to a common LIMS installation
(could be an ELN, or a multi-functional system) with each lab having its own copy of a database;
note: not all vendors support this configuration.
This could be considered as a variation of the software-as-a-service model, with the
software hosted on a private corporate server instead of the vendors.
Another variation is the use of virtualization.
Virtualization is a software technology that allows one or more servers to host multiple
copies of software running independently.
There are some benefits and limitations that are imposed on the lab.
Note: the SDMS is configured to be local-to-the-lab in order to facilitate tasks that need fast
responses.
There are multiple configurations possible with these systems and you have evaluate your
needs to determine the one most appropriate for your work.
From the labs standpoint they have access to fully functional centralized database systems:
LIMS or ELNs for example.
Laboratory data is concentrated in the SDMS with necessary information passed through
to the central database system.
The SDMS acts a buffer or primary storage for laboratory instrument data.
The centralized data system would not be modified to meet individual labs needs.
This is necessary to ensure that the data systems are easily upgraded and supported
without having to re-implement custom modifications.
Those modifications would be implemented in the SDMS which is supported by each laboratory's
independent configuration.
The major benefits are in the cost of the system when compared to purchasing and installing
multiple independent systems, the cost reduction for support and maintenance,
making it easier to add
additional labs, and the ease of providing backup and archiving.
Security and physical access control is provided by IT staff.
One popular technology application is moving software and data systems to the cloud.
From a network topology standpoint, this configuration and that on the previous slide are pretty
much the same.
The list of benefits from cloud implementations, particularly those that are vendor supported,
are considerable.
However the issues do need attention.
One of the obvious points is that the server for the database system isn't anywhere you are
likely to be able to visit.
And that raises some issue of it own.
We are used having the web take us virtually anywhere in the world with a few clicks, and
having the results pop up quickly.
We can enter information into systems without having any idea where they are, and expect
good response times.
Networks are fast enough that we are able to distinguish between the response times
for areas with well developed networks and those with less sophisticated systems.
Right now we are experiencing an example of the networks capabilities; I'm in Massachusetts,
our producer is in Michigan, and you are all over the place.
The distance between client and server systems can be measured in two ways: the time it takes
to send/receive data/information, and, the physical separation between them.
In most cases the physical separation doesn't matter, but the point-to-point physical span
can have significant impact on performance when life is less than ideal.
When we are in a planning process we have to work against potential problems, including
the security of your intellectual property.
When the servers move off-campus distance concerns increase, and new ones are added:
Those are security, downtime, delays, and legal issues.
Geographically distributed networks raise some issues.
The most obvious are delays and interruptions, those 404, file not found errors.
Or the "email delayed" messages.
They aren't frequent, but they happen.
Planning for them is essential.
Even situations like the one we are experiencing now can have problems that need to be planned
for, and I hope I didn't just jinks it.
For example we have rehearsal recordings that we can use if something prevents a live presentation.
The problem for your lab is: "what happens if your connection to your LIMS or ELN is
lost?"
What are the vendors backup plans?
Do they have redundant systems that you can switch to if there is a problem?
How often are they synchronized?
Do you know how to access them?
Have you tested the process?
The further away you are from the server the more room they have for problems to occur.
Among the causes for problems are power outages, storms like the large hurricanes experienced
in the US and elsewhere, and the potential for earthquakes.
You may feel that you are in a safe area, but how about your vendor's servers and
the space in between?
These aren't reasons to avoid using the technologies available, but areas where planning
has to be done, including testing, running the equivalent of fire drills to make sure
that plans actually work.
This is a subject where your IT groups experience, in conjunction with your vendors come into
play.
The time to make these plans is before implementation has begun, in fact, before you sign anything.
Another concern is security.
The networks we rely upon are global in extent.
So are the people who would like to have access to your data and information.
Are your corporate and remote systems protected against attacks that can include unauthorized
access, malware, denial of services, ransom ware, and other unpleasant issues.
The typical SAAS vendor will say that their security is better than your corporate systems.
This is another area where your IT group can work with your prospective vendors to ensure
functioning and safe systems.
The last point I want to make on this subject is legal issues.
When you are using software hosted on 3rd party platforms you become subject to a number
of legal issues that may originate in your location, country, or the country where your
servers are located.
For example, you may be working with a Software-as-a-Service vendor
for a database, and they host it on
a sub-contractors server farm that has locations in your country or another.
Each of these can contribute to legal concerns.
And you may not have done anything wrong.
Vendors may offer the option of hosting your database and software on either a private
server or a shared system.
If you are on a shared system, and someone else does something bad, the entire server
may be impounded, including your data.
The laws on this subject vary widely by country, and it is an evolving issue.
This is one where both IT and your legal department may need to be included before finalizing
the relationship with the vendor.
We began this presentation looking at the options for lab informatics, with all systems
residing within the labs walls, and then considered the possibility of reducing costs by several
labs using the same products. That depends upon individual labs needs analysis
converging down to compatible solutions.
That being the case, we then looked at the ramifications of consolidating systems into
shared on-site servers and then having those databases hosted by off-site 3rd party vendors,
the Software-as-a-Service model.
We also looked at how instrument interfacing, data systems, and communication affected the
distribution of informatics inside the lab and working with remote systems.
In the previous webinar, we made a statement that even startup labs need to focus on the
centralized database as one of their initial priorities, determining if they need a LIMS
or ELN for example to support their labs information capture and analysis.
Vendor supported Software-as-a-Service models may be a good way to implement those tools
while minimizing the financial investment.
In all of this, we made frequent reference to the role of IT support.
Now it is time to begin looking at that subject in more detail.
We first raised the Information Technology Support issue in webinar 3, when we discussed
needs development.
Now as we start looking at implementation and support options, particularly when the
central database system might migrate from the lab to on-campus hosting and then to off-site,
possibly by 3rd party support, the need for coordination with IT becomes more important.
There are shared responsibilities between lab personnel and IT support for the successful
use of informatics systems in the lab.
As we've discussed the lab user community is responsible for determining what is needed
and how it should function.
They have to be intimately involved in product specification and selection, as well as evaluating
the implementation options and the final system.
This stuff directly impacts their ability to work, and, the validity of the lab processes
being executed.
So what exactly should the role of IT be?
They aren't just people who support hardware and software, they need to be advisors on
software issues and in particular support.
That includes their ability to support users, and, their evaluation of vendor's ability
to support products and ensure that they are working properly.
This world is a lot more complex than office products, and people need to have the right
balance of skills to be successful, your laboratory depends on it.
We need to consider the role of corporate IT, and the possible addition of a LAB-IT
function.
In most organizations, corporate IT is responsible for hardware support, operating systems, and
frequently used applications software, office applications for example as well as corporate
database systems, and in many companies enterprise resource planning systems, and help desk support.
Enterprise resource planning includes a number of functions that run the businesses including
customer service, human resources, accounting, production, sales, and so on.
These are large, expensive system that can encompass an entire business operation.
We'll get to how that can impact your lab later, probably in the next webinar.
While the capabilities provided by corporate IT are important to the labs operation, fully
supporting laboratories is usually a bit outside their experience.
The items on the left are what companies typically see as a description of IT support.
Organizations that support manufacturing and scientific work may be able to justify personnel
that are specialized in those fields.
In some cases you may have people holding advanced scientific or engineering degrees
providing an IT support function.
The items on the right are more typical of laboratory systems.
The first bullet for example might be at odds with corporate policies of upgrading operating
systems; in a lab an upgrade could be a disaster.
There are a large number of lab applications found in any facility, which is a significant
contrast to most business operations.
Vendors can skimp on documentation, they are more interested in the technical aspect of
their products than effective user documentation and support.
The impact of system problems can be serious.
Problems can easily snowball as work gets backed up.
And finally it is really hard to find people with the skills needed to support lab work.
It isn't just technical know-how, it's people skills, trouble-shooting, and problems
solving.
With a wee bit of pressure added to keep it interesting.
What we need to do is to develop professionals with a balance of skills to meet the increasingly
complex demands of technology management in scientific and laboratory work.
At one time that might have meant understanding LIMS or ELNs, or robotics, or instrument interfacing.
Now it is a complex and specialized mix of talents needed to bridge science and technology.
The work may expand to include modeling, simulation, and the ability to handle Big-Data computing
applications and analysis.
Beyond that, these people will need to be able to understand the needs of scientists
and develop the tools to meet their labs needs.
This is where session five will begin.
And that is currently scheduled for April 26th.
During this session we've covered a lot of ground including the ability for multiple
labs to use common products, and the options for various levels of managing central databases
on the corporate and cloud levels.
Vendor hosted cloud systems could provide an easy entry point for small lab into informatics
technologies.
Care should be taken to ensure that they meet your requirements, and that they provide a
migration path to corporate on-premise hosting should that be desirable.
There will be a slide following this one in the handouts (PDF) you will have access to as part of
the webinar series.
It will have a list of additional references that will be useful for the labs work.
That's the end of the formal presentation.
Are there any questions that people would like to address?
Thank you Joe!
I'd like to remind everyone that you can submit your
questions or comments using the chat box on the right-hand side of your screen.
So feel free to go ahead and do that.
While we wait for any questions or comments to come through, we do have a few questions
for Joe that came in that he'd like to address.
So, we'll go ahead and address those questions
and we'll give you a few moments if you do want to go ahead and submit any of your questions or comments.
I also want to mention that we will be providing a recording and the
slides to everyone after the webinar today.
It will be posted on the LiMSforum.
I know we did get a few of those questions and comments in the chatbox earlier.
Ok, so Joe here's one of the first few questions here.
You mentioned that the first major component of lab informatics should be the central database system.
How do you protect yourself from making a mistake?
Well, the major approach to doing that is making sure you've done a thorough job of specifying the system.
Really figure out what it is you need to get done, what you want the system to accomplish
and what model, whether it be the LIMS model or ELN model, fits what your workflow is.
You need to talk to people who are knowledgeable in the field
and look for systems that provide for flexibility.
There are a number of them and the number is increasing
that support both LIMS and ELN functions,
so it might be easier to transition between the two of them.
But the real one, the real kicker,
is making sure you do a really good analysis and evaluation of what it is you need to get accomplished
and how your lab wants to work.
Ok great! And here is another question that we received.
What if IT support people are pushing for a system based on their ERP system? Is this a good idea?
Usually not, we'll be going into some more detail in webinar 5.
We look at more about the details of IT support and start looking at some build or buy solutions.
IT people that are using enterprise resource planning systems
have invested a lot of effort, a lot of time, and a lot of money, and a lot of training
to learn how to use those systems.
And they may have sold them on the idea that these systems are gonna do everything
that the company needs to have done.
And then the lab people raise their hand...
and there's a lot of things in labs that they probably haven't considered.
They may try to build the system around an ERP
but that's usually not a good idea...some people have done it...
but the builder or buy solution, the build or buy problem is a significant one.
It really needs a lot of thought and a lot of work.
Okay, interesting, great!
There's one last question that we received in advance here
and we'll see if any additional questions come through the chat box.
How realistic is it to want to connect instruments to a remote database system from the lab?
All right, you remember there is a distinction between the instrument which provides an analog output
and the computer system.
And in many cases when a salesman sells you an instrument,
they automatically sell you the computer as if they're the same thing.
You don't connect instruments the analog output to remote computers...it simply doesn't work.
What you really do is communicate the database structure.
File sharing, for example, between the computer that's attached to the instrument to a remote computer.
So often, when you talk to a Salesman, you'll say I want to reconnect this instrument to
my LIMS system or a remote ELN.
What you're really doing is a computer to computer connection, not the instrument itself
as part of the instrument package.
Okay great, thank you for answering those questions.
It does look like we have a couple questions that came in through the chat window as well.
This first one here... it looks like, it seems like the question is asking:
Can you provide criteria to consider for remote server hosting?
What do you mean by criteria?
Basically, when you're dealing with a remote server you're really dealing with
something akin to a time sharing...
...a time sharing operation
where you're sending data to an instrument, you're sending data to a remote database
and getting information back.
It's a lot like working with a web browser.
So among the things you want to be concerned about are response times, response speed,
how the data is being controlled, uptime on the servers, that kind of thing.
Basically ensure that when the server is there, when you need the server to be there, it'll be there working.
Not quite sure what it is you're trying to get at.
Okay yeah, if there's some more clarification that's needed,
just let us know in the chat box, but hopefully that answered your question regarding hosting.
Yep, if it didn't on the bottom of the slides is my email address. Just send me a note and we can talk that way.
Okay great, that's wonderful that you've provided your contact information Joe so that if anyone wants to
speak with you one-on-one then you can certainly contact Joe and he's a great resource for that.
And it does look like that does answer Nathan's question there.
Another question that came through is:
What is the difference between a traditional SDMS and a LIMS that has a module that emulates similar
functionality, but is not considered a true SDMS?
An example is provided...
Ex. A lab where it doesn't have an SDMS, but says they have similar functionality through a module.
Well, it's a lot like saying you've got something that looks just like a duck but it's not quite a duck.
It's kind of hard to answer that question without knowing what your situation is.
SDMS's have been around for a while.
Waters has a number of them.
A matter of fact, Waters was originally provided by a third party and became part of their system.
The question really comes down to is, what do you need to have done?
An SDMS can be looked at as being a very large filing cabinet that can handle a lot of different stuff:
Reports, documents, images, instrument data... that's sorted by project, by instrument type, sample types...
you can sort things a number of different ways.
So the easiest way to answer that question, is say:
These are the functions I need. These are the facilities that I need. This is how I want my lab to work.
Does the SDMS meet those needs?
And then, when you turn around to a LIMS vendor, for example, and look at what they provide...
...you can say fine, does your system meet all these needs? Or is there a lot of hacking or a lot of software
development that has to be done to get things working?
An SDMS provides a point of connection for a lot of instrumentation,
a place where a lot of data can get dumped that doesn't fit into a LIMS file structure.
And then the parts that do belong in the LIMS file structure can be extracted and moved forward.
So again, a lot depends on what problem you want to solve.
Okay, great. Thanks for answering that and of course if you do want to talk with Joe, one-on-one, his email
is available on the slides and we've provided it through our communication emails,
so you can dig there as well.
It does look like that did address their question Joe, so thank you.
Joe's email address again is joe.liscouski@gmail.com
It will be in the slides, so you can connect with him.
I don't see any other questions that are coming through at this point in time.
What we can do is we can start with our closing information and of course if any other questions
come through, feel free to go ahead and submit those. But it looks like we've covered all of those questions.
Joe is there anything else that you would want to cover before we go ahead and wrap up here today?
Just thank you for you being here and as I said the next session we're going to get into more
information about IT support; that tends to be a very important question.
We'll be beginning to look at the build or buy; and then future sessions will look at instrumentation,
instrument data systems, and moving down the line to sample preparation.
Okay great, thank you so much Joe! It doesn't look like there's anything else coming through,
so I believe that that will conclude our webinar session here today! Thank you so much!
And as a reminder we will be sending a follow-up to everyone registered with a link to the recording,
as well as the slides. You can locate Parts 1, 2, & 3 of this webinar series on the LiMSforum
and we'll include that in our follow-up email as well.
So we'll see you next time and thank you so much!
-------------------------------------------
Sublime Text 3 Geek Installation Guide & Tutorial with Free License / Serial Key [ 2018 ] - Duration: 11:06.
Nobody can give you freedom, nobody can give you equality or justice if you are a man you take it.- Malcolm X
I already Include the download link w / working license in the description to save your time. :)
-------------------------------------------
#4 (*NEW*) warframe 💀 challenge complete | skill up | tutorial | game play | guide | review (2018) - Duration: 14:52.
I mean actually I was taken at a carnival ready turn 12 it does obvious
it's a bad case community and the crash but again crushing the by
Padma motmot to rap because she gets it
our invasion
ha
well as a gas motor to to eat have a cast potable ice and each other got an
actual water down the action fortunately we apply automatic something
like that always there automatic mode versus you okay Pat's on a bar it up the
MA deuce purposes um trashy cane is a boon know what happens in a better area
policy it automatically against original educator anywhere ever that we excellent
short order some odds never come as a
pilot for we just have negative cash good effort to you NASA a canary J
montaner say we wash we could watch you know it is a
at 17 um so our export x of Karachi on a relic
neritic a cube bharata rajah the company knows
then we collect indonesian eq4 vision this is to Tammy Alexander
an artifact has been located proceed to the dig site void fissures
you need them to open a public but are you confident you can withstand their
carrie fisher's defend yourself and use reacted to open relics in assembly the
enemies are dropping reactant
Oh
you are going to need more reactants if you want to open that relic there's no
lack of I don't know it's good day and I just put up
without anybody they believe was okay
hola
excavator is ready to go keep it powered and protected from enemy fire
oh yeah
I mean it the jealousy excavator has lost power find another cell
go to the dig site
I can order it I just need to memorize
we just uncovered left to lose our reaction to open up
naturally all right an artifact has been located
proceed to the dig site and deployed protect via mobile it extracts the
artifact
the excavator has run out of power
I mean Sean Hannity's need to drop the
estimates it's a little past life
that's it you open the relevant finish your mission and we'll take a look
excavator is ready to go keep it powered and protect it from
enemy fire in the Gulf Olympic unity Wow nice this scanner has picked up a
target go to the dig site
we need another Power Cell for the excavator excavator deployed protect the
unit while it extracts the artifact
config' your hardwork has just been rewarded extraction is now available
Wow activated in Genesis our own niger river near ionia no general
turbomachinery arrow after a helicopter they are effective you want a
refrigerator
helicopter sir all right sir cool soft janessa it already
you know you're entitled to say it's
extra Tech's the remaining dig sites regular black
they're back
go to the
excavation complete look what we found
Không có nhận xét nào:
Đăng nhận xét