Thứ Bảy, 3 tháng 3, 2018

Auto news on Youtube Mar 3 2018

Don't forget to LIKE and SUBSCRIBE ❤

For more infomation >> Hilarious Guide To Dog Breeds That Will Help You Choose Your Next Dog - Duration: 5:08.

-------------------------------------------

A Beginner's Guide to Typing Special Characters (#1606) - Duration: 3:38.

If you're new to Mac you may not yet know the best way to type special characters.

Of course you can type any letter or number or symbol that you see on your keyboard easily

enough.

But let's say it's not a character on your keyboard.

For instance, let's say you want to type the letter e but with a special accent mark above

it.

Well, the easiest way to do that for letters with accent marks, especially letters that

appear in non-English languages, is to simply press the key on your keyboard and hold it

down for a second.

So I'm going to press the e key and hold it down until this little menu appears below

showing me different versions of the letter e.

Now notice there's a number underneath each one.

I can use my mouse and actually click on one of these or I can actually tap the number.

So I'm going to tap the number two and it types the appropriate letter.

So this works for lots of different letters on the keyboard.

For instance let me press and hold o and you can see I get variations there.

Press i and get variations there, c, etc.

Not all letters, of course, have variations.

But if you want to type basic accent marks or variations on letters the way to do it

is simply press the key and hold it down until you see those little variations appear.

Then press the number on your keyboard.

But what about other special characters.

Like special symbols and emoji.

Well you can type those in any app that supports them.

So any modern app like Mail, Messages, Pages.

I'm in TextEdit here.

It could be Microsoft Word.

Anything that supports these special characters.

All you need to do is use the special keyboard command.

That's to hold the Control and Command keys down, both of those keys being held down,

and then press Space.

Then you get this special menu here that allows you to scroll through using your mouse or

trackpad.

You can scroll through and see all of the different emoji characters.

All the way into different symbols and anything that's kind of standard on most computers.

You also have little items at the bottom.

This is frequently used things.

I can jump right to smiley's, jump to animals.

So this goes to categories.

It all the same list here.

This is just a quick way to jump through them.

At the very top here there's a Search field.

So if there's something I know I'm looking for I can search for it.

But let's look at how to type a regular character here.

I can just click on this grinning face and it inserts it therein.

It's just a regular character.

I can hit the Delete key and delete it.

So Control Command and let's say I want to search for something.

I want to search for different hearts.

I'm going to type heart and it's going to just focus in on any characters that have

that in its description.

So you can see different hearts here.

You've got a smiley face with hearts for eyes.

Even playing cards that have hearts in them.

So you can choose any one of these.

Let's choose the broken heart.

There.

So this helps you quickly and easily find something that maybe fits the situation.

It also helps you find different symbols.

For instance, I'll type root and I can find there's the square root symbol, cubed root,

quad root, and all that.

You can find symbols by typing something that describes them.

So there's a whole bunch of different arrow symbols for instance.

For more infomation >> A Beginner's Guide to Typing Special Characters (#1606) - Duration: 3:38.

-------------------------------------------

✅ OBS Studio - 2018 Ultimate Guide to Streaming to Twitch [BEST SETTINGS] - Duration: 15:18.

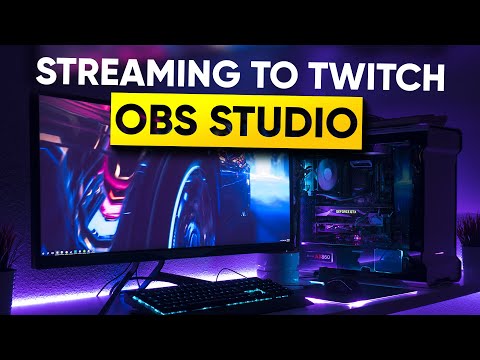
What's up guys welcome back to the

Gaming Careers YouTube channel where we

teach you how to livestream and how to

create content within the gaming niche.

Now, a little over a year ago when this

channel was super small, I created a

video teaching people how to live stream

on Twitch using OBS studio and

what settings you needed, and I didn't

know at the time but when I created the

video it instantly became my most

popular video and it has remained my

most popular video ever since. I think at

the time of recording its taught nearly

700,000 people how to stream to Twitch.

Now with that video being a little over

a year old it is also a little bit

outdated. It has a lot of relevant

information in it still, but it's a bit

outdated really for three main reasons.

Firstly OBS has had 20 new

versions since I made that video so

there's been lots of updates including a

nifty little auto-configuration wizard

to help get your settings right. Secondly

Twitch has heavily invested in their

infrastructure all around the world and

have updated their broadcasting

guidelines and what settings

you should use to stream since I created

the video and thirdly, graphics cards

companies like AMD and NVIDIA have also

heavily invested into developing chips

that they include with their newest

graphics cards that help take the

encoding process away from the CPU so

for those three reasons the guide is a

little outdated and I thought today I

would do a 2018 version. Now as with the

previous video, we will be going over the

key settings so things like which Twitch

server to stream to, what bitrate, what

framerate, what resolution, but we will be

using the OBS configuration wizard which

wasn't included when I made the last

video and that's going to help set up some

of our settings for us straightaway, so if

you're ready let's dive in!

So first things first, let's download and

install OBS studio by heading to the

website which I've included down in the

description below,

you'll just need to expand the

description to see it and I've also

included a link on-screen. Now once you

arrive at the website you need to choose

your operating system that you're going

to be installing for between Windows, Mac

or Linux. I'll be installing for Windows

but since OBS studio is multi-platform,

all the settings we cover in this video

are appropriate for the Mac and Linux

versions as well. Install the application

as you normally would and launch OBS

when installation has finished. When it

launches it should look something like

this. Now for those of you that are

completely new to OBS, this may look a

little bit hectic, but it's really just

made up of a few different sections.

Firstly up top this is the stream

preview, this shows exactly what OBS

studio is sending out over the Internet

to Twitch. Down in the bottom left you

have the scenes and sources sections.

Scenes are effectively just different

screens that you can switch to, to

display something different to your

viewers. Typically people will have

at least a game scene, a be right

back scene and maybe a starting soon

scene. Sources are individual elements

that you want to display in each scene,

so for example in our game scene we

might want to show the game, that's one

source, as well as the webcam, that's

another source and maybe a

recent subscriber and that's a third

source. In the middle at the bottom we

have the audio mixer, this is where we

can see and change the audio levels of

all the different audio sources. So for

example our desktop audio source or our

microphone source. To the right of that

we have the scene transitions which is

just basically a way of choosing how you

want the transition to show between two

scenes. Finally on the right in the

bottom you have some controls for

starting and stopping your stream or

recording, as well as getting into your

settings. Below that you also have some

little info panel showing you how long

you've been live for, how long you've

been recording for, as well as your CPU

usage and your frame rate. Before diving

straight into these settings and the

configuration wizard the first thing

that we want to do is set up our profile

and our scene collection. If you look up

at the top title bar here you will see

that we have profile untitled and scenes

untitled, and that is because we haven't

set up any profiles or scene collections

yet. OBS allows you to have

multiple different profiles each with

their own set of settings, which are

super useful if you are going to be

streaming to different accounts from

time to time. All we'll do here is we'll

rename the default one by going up to

profile and selecting rename. I'd

recommend naming this whatever your

channel name is and the streaming

platform, so it's easy to make sure you

have the right profile selected when

you're using OBS. So for me that's going

to be 'GamingCareers - Twitch' because

I'm going to be streaming using this

profile, my gaming careers Twitch

channel. OBS also allows you to have many

different scene collections each with

their own set of scenes and sources

inside. This is super useful if you're

going to be streaming different games

from time to time and you want to have a

different looking stream for each game.

Again we're just going to be selecting

scene collection, rename and rename it to

whatever makes sense for your stream. I'm

going to be naming mine 'Gaming Scenes'

because I also have collections for

podcasts and other shows that I do. Now

if we look back up at the top title bar

again you should see that we now have

our profile and scene selection set up

properly. In the previous video that I

recorded last year, at this point we had

to dive deep into the settings of OBS

and start testing our connection. Though

at some point in the last year, OBS added

the auto configuration wizard that aims

to test your computer and your internet

connection to Twitch or YouTube or

whatever platform you end up choosing,

with the aim of setting a lot of these

complex settings like bitrate, server

location, resolution and framerate for

you. Now although these settings that get

set may not be bang-on perfect they

certainly give you a very very good

starting point for your stream settings.

So to run the wizard we come up to tools

and select auto configuration wizard. A

new window will appear which will ask

you if you want to optimize your

settings for streaming with recording

being a secondary, or if you are just

optimizing for recording. Since this is

the ultimate guide to streaming with OBS,

I recommend that you guys choose the

first option and press next. The next

screen allows you to select your base

resolution or your canvas resolution and

your FPS preferences. Let's start with

the base resolution. This should be set

to the resolution that your game is

being run at, so if you're playing on a

1920x1080 monitor and you play your

game at that resolution also, then you

should select 1920x1080 here. It's

worth noting that this isn't necessarily

the same as the resolution that you will

eventually stream at, OBS may advise to

scale down your stream to something like

1280x720 but it's important to set it

here to what your monitor and more

importantly what your game resolution is.

Since my monitor is 1440p I will be

selecting that resolution here. The

second option is your frames per second

or FPS and that allows you to choose a

number of different options as to what

you'd like to stream at. You can select

some hard values like 30 and 60 or

there's also these other two preference

based options. The first one 'either 30 or

60 but prefers 60 when possible', this is

for people that want to prioritize

getting 60 frames per second over their

resolution. Whereas the 'either 60 or 30

but prefer higher resolution', this is for

people that want to prioritize getting a

higher resolution over the 60 frames per

second framerate. So which of these

options should you actually choose, well

that's completely up to you, do you want

the smoothest possible video or the

highest detailed resolution. For fast

paced games such as first-person

shooters or racing games, I would

recommend prioritizing 60 FPS, but feel

free to choose either option.

Just remember the OBS wizard will only

recommend 60 fps or the higher resolution

if it deems your computer and your

connection are good enough to be able to

handle it. Once you've decided you can

click next to move on to the stream

information step. This is where you're

going to be choosing which platform you

wish to stream to as well as entering

your stream key. Firstly stream type

allows you to choose if you are going to

be using a streaming service or if you

want to be using a custom streaming

server. Since we're streaming to

Twitch here I will be choosing streaming

service. Next we'll get a drop-down of

all the different current services that

OBS support, so Twitch, YouTube, Mixer,

Facebook are all in there and we're going

to be selecting Twitch. Next we need to

enter our stream key. So this is the

private key that we can get from our

Twitch account and it's the only thing

required by OBS to allow you to stream

to that Twitch account, so this is a

private key that should be kept private.

To get the key, you can click the little

link in OBS to open up your web browser

to the right page where the stream key

is shown. If you aren't already logged

into Twitch on your browser then you'll

obviously need to log in before you can

get your stream key. You can also always

access your stream key by going to the

Twitch website, then go into your

dashboard, clicking channel

under settings and then finally clicking

on your stream key. Twitch reiterates

that you shouldn't be sharing this key

with anybody else, obviously I'm going to

be showing my key here in this video but

there's also an option to reset your key

which I'll be clicking as soon as I

finish making this video. So last time I

did this, everyone was commenting you

know you said you couldn't show your key

and you showed your key, but obviously I

just reset it after I've made a video.

Select the whole stream key and copy it,

head back to OBS and then paste it into

the stream key box. The next two boxes

should usually be left checked. The first

one which is 'prefer Hardware encoding',

means that OBS will try and use the GPUs

dedicated encoder chip if it has one,

which is usually preferable as it frees

up your CPU which should in theory help

reduce stream issues. However hardware

encoding does also usually result in a

lower quality encoding for streaming. I

personally would recommend using the

hardware encoding if you can and leaving

this box checked, obviously if you're not

sure whether or not your graphics card

has the encoding chip, you can leave this

box checked and OBS will check for you,

but actually the ideal setup would be

for you to test both CPU encoding and

GPU encoding on your stream and seeing

which one you think makes better results

in terms of quality as well as in terms

of the system performance impact. The

second box which is 'estimate bitrate

with a bandwidth test', this just means

that OBS will perform a test to some

local Twitch service to try and find an

ideal bitrate that you can stream at.

Once you're happy you can click next and

OBS will begin to start performing its

configuration tests. What it is doing is

streaming some random data at various

different resolutions, bit rates and

frame rates to Twitch servers without

actually going live to try and work out

what your system and your connection is

capable of. This test is pretty quick,

takes less than a minute and when it is

complete you should get a window showing

the test results. Take a look at all the

different settings that OBS has

recommended, what resolution the output

stream will be at as well as what

bitrate and what FPS. Clicking 'Apply

Settings' will mean that OBS will then

apply these settings to the current

profile. I just want to reiterate

something and make it really clear that

this is OBS's estimate as to what the

ideal settings for your setup would be.

Most people at some point in their

streaming career are going to have to jump

into the settings window and change one

or more of these values

to keep things stable. All of these

settings that have been applied can be

found if you click the Settings button

here on the right and look in the

relevant tab. The stream tab is where

your streaming service and stream key are.

The output tab is where the video

bitrate, the encoder and the recording

options are, and finally the video tab is

where the output resolution and FPS

options are. There's also some tabs for

general, audio hotkeys and advanced for

you to have a look at if your heart so

desires.

The final thing we need to do before we

start streaming is to add a scene and a

source. Let's start by renaming this

default scene called 'scene', by

right-clicking it and choosing rename.

I'm going to call this scene game since

it's going to be the scene that has my

gameplay in. Next move across to the

sources panel and click the plus icon.

This shows all the different types of

sources that you can add to each scene.

Things like text, image overlays, webcams,

browser windows and all sorts of other

things. To keep things super simple for

this video we're just going to be

selecting game capture since we want to

start by capturing our game. Make sure

that you have your game running at the

same time as setting this up so that we

can make sure that it's captured

properly. Name it whatever you want, it

doesn't actually matter what you name it

but it helps to identify each source.

Once you're further on in setting

up your stream you have many

different sources in each scene, it's

going to really help if you have them

named properly. I'm actually going to be

leaving mine as game capture since this

is always going to be the source that

captures my game, no matter if I change

game. Once the game capture window has

opened, it gives you a number of

different options for its mode. If you

always play your games in full-screen

rather than something like windowed or

borderless, you should be able to leave

the mode on 'capture any fullscreen

application', this just means that OBS is

always going to find the full screen

application and choose to use that as

its source. However for some games that

doesn't always work or maybe you're

running your games in a window or a

borderless mode, in which case change the

mode to capture a specific window and

then select the correct window you want

to capture from the next drop-down.

Hopefully you should then see the screen

preview update with your captured game

and that is basically the very

beginnings of building your stream

layout and design. At this point I'd love

to recommend you watch my video on

adding more sources to OBS,

it covers adding games, webcams, overlays

and text as well as covering various

issues that

some game capture methods super from such

as the black screen bug. I've linked the

video down in the description once again,

but also you should be able to click a

little link in the top right corner. I

also have a whole playlist on how to do

various things on OBS, if you're new to

this channel it's definitely worth

subscribing and having a look around all

the cool things that we've learned how

to do for your OBS studio stream. Thanks

so much for watching and hopefully you

have enjoyed this 2018 version of how to

stream to Twitch. Another video that I'm

just going to recommend if you're having

any issues with your stream, I do have a

video on Twitch Inspector, which is a way

of being able to analyze what's going

wrong with your stream and helping

decide what settings to change, so

definitely check out that video. Again

down in the description if you're having

any issues. It's really interesting for

me how much easier this has become.

It's become so much easier to setup your

stream with things like the auto

configuration wizard and there's so much

more detailed information that Twitch is

actually giving out so it's nowhere near

as long of a setup process and hopefully

you've been able to follow along and

have something that you're happy with.

Finally I want to finish just by

thanking again my Patrons. They're

supporting the creation of these videos

for the whole of the Gaming Careers

community so I'd like to say a massive

thanks to these people here for

supporting the channel. If you

haven't yet joined our Discord, we have

over 100 members now all in our

discord channel, talking about how to

improve streams and networking and all

these kind of things as well as just the

general jokes and memes, so if

you haven't joined the discord yet

please do. If you would like to also

become a Patron I would really love it

if you would go and check out my Patreon

page, again linked in the description

below,

there's loads of perks that you can sign

up for such as getting

shoutouts in this video but also things

like stream promotion in discord or

hosted on my website as well as various

other things that I'm offering, so please

do go and have a look at my Patreon and

consider supporting if you have found

these guides helpful. Thank you so much

for watching guys and I will see

subscribers in the next video. Peace!

For more infomation >> ✅ OBS Studio - 2018 Ultimate Guide to Streaming to Twitch [BEST SETTINGS] - Duration: 15:18.

-------------------------------------------

A Guide to Creative Flow · Getting into 'The Zone' · This Book Taught Me How - Duration: 16:59.

For me, getting into the zone is that moment where you kind of cease to exist

in your thinking self; you become whatever you're doing in that moment, and

whatever you're doing is all that you know. If you're drawing it's like there's

no you and the pen and the paper and 'the decision to put this here will result in

this', it all just comes together into a mutual relationship of all these

elements coming together and unfolding right in front of you. To put it simply,

the thing that sets it apart from any other normal drawing practice is that,

when you're in the zone there's no commentary, there's no more voice in your

head analyzing and making decisions and solving problems. When you're in the zone,

that voice stops- the concept of time stops- for however long, you're completely

suspended in just the act of creating. Not thinking, the movement of your hand

ebbs and flows naturally on the page and the marks you make seem to be making

themselves. It's like you're moving the pen as much as the pen is moving you. *mic drop?*

I'm painting a screenshot from Magnificent Seven by the way, and one of

you guys recommended it for its cinematography so I thought I would give

it a go. Definitely looks like a really good film. I thought I'd use this as an

opportunity to test out my landscape painting skills.

Being in the zone is such an incredible place to be and I've realized that it's

no different really to being in a state of meditation. The core concept of

meditation and mindfulness is to connect with the present moment and it's the

same here but instead of anchoring your thoughts on your breathing or your

physical self- your physical sensations- as you do with traditional meditation,

when you are entering the zone it's like we've unintentionally been meditating

the whole time, just focusing on the movement of our hand across the page or

just watching intently as art emerges on a page in front of you. And you might

have noticed recently that quite a few of my videos have shared this similar

tone of being present and mindful while creating; stepping out of the thinking

mind and into the being mind and focusing only on now. I've talked about

how it can help to notice and catch the negative thoughts of the inner critic

before they lead to discouragement and doubt, and also how being in the present

moment can just allow you to enjoy the process of making art regardless of the

end result just taking value in the journey, not just the destination so that

regardless of whether you make the biggest mistake you ever could, no art

practice could ever be seen as a failure.

And I can't pretend that I made this connection myself, of meditation and

being in the zone being pretty much the same thing, even though it does seem

quite obvious now. I've learned so much recently and really been able to change

my approach to creativity and art from what I've learnt from a book that- would

help if I had it to hand- one second-

This is mindfulness and the art of drawing by

Wendy Ann Greenaghl who is a writer and artist with 20 plus years of mindfulness

experience behind her, which she uses to teach people how to create freely,

conquer their inner critic, enjoy art and banish creative blocks. I got this

book as a late birthday present from my friend Linden and it's not big, it's not

wordy and overly complicated, it's quite a small book but it is so packed full of

inspiration and insight.

Also I like- and what I find that a lot of books like this lack is- that it's not

superficial or too out there and airy-fairy. It actually comes with a lot of

practical exercises, at least one or two for each point that the

author makes and so rather than just reading it in thinking 'that's a good

point' and then just moving on with your day, you're encouraged and guided-

sometimes even step-by-step, to take action and do something and put the

things that you've learned into action. You know, not just take the author's word

for it but actually experience it for yourself.

And getting into the zone is just one part of this book, it has so much to

learn in there because it's not just about the act of drawing. It teaches you

things that you can take into your daily life. So for example, there is a section

on self-portraits that goes into dealing with the scrutiny with which we look

ourselves and dealing with insecurities and self-judgment. It teaches you how to

look at the world through the eyes of an artist, see beauty and inspiration in the

most ordinary and everyday things and just travel through life with new

awareness to the things that are around you. Being able to travel through the

world with your eyes open rather than trapped in your head- which is what I

think most of us do most of the time. Just to give you a sense of what I'm talking about

I'll read a little bit just you can get an idea; 'Suddenly there are things to draw

everywhere. On our walk to work, red rose-hips droop on the tops of

straggling rose bushes in our neighbor's autumn gardens, on the bus the nobbled

nose of an old man or the thick shock of hair on a teenager's head leaves our

fingers itching for a notepad and pen. The gift of mindfulness- the gift of

awareness- is that in clearing our minds, pausing and coming into the present

moment, in simply being, we are offered the whole world and without all the

distractions of the thinking mind to get in the way ,we are able to open to it

more fully, more effortlessly than we ever have before...' And I'm not typically

into like far-out books that you know tell you to be 'one with your

truth' and 'open your heart to the universe'. There's one book in particular

that has come recommended a lot from a lot of people that I watch and listen to,

a self-help book that you really hear about a lot but I honestly- I'm not going

to name it- but I have never been so desperately underwhelmed by a book. I

just find that some of these things can be quite superficial because it's all

well and good to tell me that I need to change my life and these are the things

you need to do to change your life and how great your life will be once you've

changed it but you need to get into the nitty-gritty of how. For me anyway.

And the most valuable how that I learned in this book was how to get into

the zone. Although there are step-by-step instructions in here, it isn't a

step-by-step instructional book. It gives you the tools and information that you

might need to be able to take that forward into your own life and

translate it however it will work for you. So I'm just going to give you some

examples of how I've used it how I've interpreted it and how I fit it into my

art and creative process. So to start with, I have to set my intention. I have

to decide that I'm going to do a mindful drawing because not every drawing

practice is going to be a mindful one. There are times where I do have to be

more critical, if I'm doing studies for example. There are times where I

want to be open to the critical voice, the commentary and the questions I'm

gonna have to ask of myself while I'm doing a study, so I decide beforehand

that the first drawing practice of my day will be a mindful one. That way, no

matter how things go throughout the day creatively, I'll at least have that moment

to myself where I've been able to enjoy the process of creating art and I'll

have that always to look back on as a success for the day. Now the key thing

about the zone is just- to put it simply- keeping your attention on the process of

what you're doing. I don't know if that what's the simplest way to put it.

Basically, if you're thinking about what you are going to have for lunch later,

as I said in the inner critic video, notice it and being able to bring

yourself back to the present moment. So it's just you, your page, the pen, no

judgment, no commentary- good or bad- just an awareness of what's happening. And you

might find, especially at the beginning, that your mind wanders a lot. You might

find that every 10 seconds, you are realizing that you're not focusing on

what you're doing and having to bring yourself back into the present moment,

and that's fine -that's actually pretty good- because if you weren't being

mindful you wouldn't have been aware of the fact that your mind had wandered. So

it's just a case of making sure to try your best to notice the mind wandering

and bringing it back to centre. One really easy way to get a feel of having

your mind in the present moment is my

favorite practice in the book and that is to draw your hand with your eyes

closed. Which sounds a bit silly and maybe if your approach to art isn't to

explore and experiment and enjoy the ride, then maybe this isn't for you but

what I found when I tried this is that I really managed to connect with myself,

the feeling of my hand as it is in that moment, because you have to

feel it to draw it. And you're just letting that feeling almost like flow

through you onto the paper which you're also not looking at. You're just trusting

in yourself and the sensations and you're really focused on just those

things that you're doing you're focused on the feeling of your hand and the

movement of your other hand drawing.

And once you have an idea for how that feels, you can start drawing with your

eyes open and start not just seeing but really looking at what you're drawing.

And being able to hold that attention on what you're drawing and not get lost in

what you think it looks like or what you think it should look like, which I think

we all do a lot. When you are drawing from life and you realize that you

haven't even looked at what you're supposed to be drawing for like five

minutes because you've been caught up in creating the image of it that you think

it has. So I have turned my first drawing of the day almost into its own ritual. I

start by really carefully and intentionally choosing my tools, laying

them out and taking the time to reflect and really think about and feel grateful

for the things I have and the process behind them being made and each little

thing that goes into allowing me to create. Then I'll start a present, mindful

drawing practice and then I will finish off again with a reflection just a

moment to myself to thank myself for showing up, for getting something done

regardless of how it turned out, I have achieved something, and it's important to

recognize that every single time. All it really is is a positive, valuable time

with yourself and all it boils down to is focus. Focus leads to absorption

which leads to flow. And with that in mind, it doesn't really need to be any

more complicated than that. You don't have to follow a routine thinking;

'which part do I do next?'

It isn't a step-by-step path to a meditative state. Just keep it simple and

stay focused.

And with that in mind, you can really apply this mentality to all sorts of

things. If you're a writer you could be staying focused on the sensation of your

fingers on the keyboard or watching the cursor move and letters forming in its

wake, if you're a dancer, be present in the sensations of your body

moving and the cause of effect of this movement leading to sensations

over here.

To finish, there are six kind of truths of mindfulness that apply whether

you're meditating or drawing or writing. And the author in this book has adjusted

them slightly- these six kind of mantras have been around since I think

the book says like the 11th century, one of the leading mindfulness practitioners

I guess outlined these words - and the author has really loosely translated

those to fit in with drawing in mind. So instead of me going on about them, I

will just read them and they are; 'Let go of how you drew yesterday, let go of the

drawing you might do one day, really experience drawing as it is right now,

don't overthink it, don't force it, just relax, just draw.' So if you take anything

from this video, just let it be those six points. Write them down in the front page

of your sketchbook and remind yourself every day of those key things.

Let me know if this video is useful for you in any way, let me know if any of the

points resonated with you all and if you might be interested in adopting

mindfulness into your everyday life. I'll have a link below to this, it will

probably be an Amazon affiliate link which just means I will earn commission

if you do decide to buy it but obviously if you want to search for the book

independently you can do that; I will leave the title of it below. I might make

this a thing this 'this book taught me' make it a series. I am reading a lot more

at the moment and it would help to keep me accountable for my daily- daily??-

monthly drawing targets. So let me know if that's something you'd be interested

in. And if you like this kind of format of a long chatty video, I actually do

these every couple of weeks over on patreon but live so you get to chat and

we get to hang out while I'm doing it; you can ask questions, I also talk a

lot more about the process of my artwork and I talk about the things I am

listening to, reading, learning about, anything

I'm currently obsessed with...

'Vin Diesel as a Viking. Long hair, long beard. Father,

husband, warrior...'

Yeah if you are interested in that haven't have a look.

I'll have that link below. If it doesn't suit your fancy, that is fine. Otherwise,

thank you guys so much for watching and I will see you soon for the next video.

Bye!

For more infomation >> A Guide to Creative Flow · Getting into 'The Zone' · This Book Taught Me How - Duration: 16:59.

-------------------------------------------

[Honkai Impact 3rd] Myriad Abyss 26F at 67k° plus Mini-Guide Part 2 for V.Triumph - Duration: 5:17.

CC is added. Disable it if you're not interested on the mini-guide.

Hello everyone, welcome back for another mini-guide!

This will be a part 2 for my Valkyrie Triumph mini-guide.

If you haven't seen the part 1, the link is in the video description.

Part 1 is all about cancelling or preventing VT's QTE to trigger as well as the reason why you shouldn't use it.

Without further ado, let's get started. This mini-guide will be about attack rotations and a small gear talk when it comes to V.Triumph.

I'll start with my new attack rotation for DB-VR-VT team.

The reason why this gets an update is due to the availability of a new stigmata, Theresa Origins M.

Theresa Origins M is a free stigmata given from a previous event. It reduces weapon skill cooldown by 30%.

This stigmata is mandatory for Valkyrie Ranger on abyss. The better version is Siegfried M with -40% cooldown.

Pairing VR with Dimension Break is common for the extended freeze trick.

Casting Water Spirit Type-II's weapon skill followed by a switch to DB will create a freeze that lasts long thanks to the timelock provided by DB.

But now that Theresa Origins M can be used, this will let VR to quickly re-freeze the enemy much earlier so you can repeat the freeze+timelock combo w/o letting the enemy retaliate.

Yes, it simply means you can infinitely freeze the enemy as long as you can keep rotating the freeze and timelocks.

There is a catch though, for an enemy to take full duration of debuffs, they need to have 0 shields or simply, broken shields.

If you focus on the attack rotations too much and didn't notice the enemy shields, it might lead to a surprise attack so be very careful.

For example, a Honkai Crush with shields can end the freeze+timelock much earlier compared to the shieldless mobs.

And would attack you as soon as they are able to, and if you didn't notice it immediately, that can be fatal.

That's why if you noticed in this video, I always try to be cautious when attacking the debuffed enemies.

I would sometimes shorten my attacks to just 1-charged attack (2 swings) because the enemy might suddenly retaliate.

As for my full attack rotation, I now take advantage of Theresa Origins M.

As usual, start with VR's evasion skill to unleash a Blackhole. Followed by Type-II's weapon skill and then switching to DB for timelock.

I would then do a charged attack (2 swings) which is sometimes followed by another charged attack or just a normal tap to maximize the SP regen.

Now use Blade Field to extend the freeze debuff like how timelock extends debuffs. Followed by 2 charged attacks (4 swings).

Switch back to VR and do some normal taps to regenerate some SP. Once Type II can be used, cast it again and do 2-3 taps.

Switch to DB for timelock and this time you can use Tyr's weapon skill afterwards if you have the weapon for an extra burst.

FInally, switch back to VT to do 2 charged attacks again.

If you're confident that all enemies doesn't have shields, switch back to VR and freeze them again and restart the rotation.

That's the full attack rotation. If that's too long to remember, I'll post a summary in the pinned post below.

Now, unto the small gear talk.

There was a commenter on one of my other video, I'm referring to the 18F Myriad fail video.

This commenter said that Blood Dance is required for Himeko on Myriad.

I don't agree. The damage increase of Blood Dance and Balmung for a physical valk barely has any difference. Different application but both are strong enough.

The heal of Blood Dance is extremely negligible when it comes to Myriad and the only time I would agree that Blood Dance is better is when it comes to elemental Himeko valks.

Another thing this commenter said is that VR should be using a tank build. Basically a high HP pool build.

Again, I don't agree. It might work on lower temperatures but on high temperatures with really painful bleed, it just won't work, more so if it's Myriad.

Reason why is because having a high HP pool only decreases the effectiveness of heals and health packs.

What you need is good sustain in the form of either healing back the HP or mitigating the bleed damage from abyss.

This means that the best stigmata to drastically improve the survivability of the support, which is VR in this case is to use Lier Scarlet's 2-pc set effect.

A poorman's build would be to use Rowland T and Rinaldo B, the heals from these stigmatas would try to counter the bleed as much as possible.

Remember, increasing the max HP is simply just that, it has zero increase on your efficiency.

And that sums up this mini-guide! I hope you guys enjoyed~

For more infomation >> [Honkai Impact 3rd] Myriad Abyss 26F at 67k° plus Mini-Guide Part 2 for V.Triumph - Duration: 5:17.

-------------------------------------------

PERSPECTIVE WILL GUIDE YOU IN THE RIGHT DIRECTION - Duration: 7:34.

As I keep continuing on about this Practical Resilience framework, now we're

on to the loss of the collision pillars, which is perspective and it's also my

favorite one! So, in this diagram, where I have spoken about adversity mindset and

gratitude, the main pillars, and then things start to converge so then we have

discipline and then obsession and we're up to perspective. So that is the

convergence between adversity and gratitude. Because as soon as we think it

is crazy there are so many times where I've got myself out of a rut and I've

used perspective to help me grow from reflecting back on certain situations

and it makes me realize that I actually don't have it that bad compared to a lot

of people in this world. One time in particular was when I had to run for 24

hours around a 400 meter track for a family that just lost their dad so shout

out to the Percival family! For the first event of last year the first big event,

dedicated this 24-hour run to this one family because they just lost their

dad, they lost a family figure, they lost a husband, they lost a source of income

and by giving back gotta run for 24 hours and whatever we can raise with

funds and awareness could go to this family to help them get by. I'm

running I'm running I'm flying I'm doing a lot of it with my blind friend, Damo and

we're just we're flying and then he has to end up having to go home and then I'm

back in. Everything went well to about 17 hours into the run and then BOOM it's

like getting hit with like a truck and it's like I've got like depression lever

again and I'm struggling to get by and it's taking me about two hours and I am

I end up having to walk for a bit because I just my legs are screwed I'm

just too tired I've just been going all day I've surpassed all my mental

glycogen, more than what I expected and even though it was flat compared to

races where we were in trails. I'm still quite knackered and I somehow get out of

this rut. And it's it comes back to this one this

one like moment of realization I go, "Tofe, you've only got seven more hours of

this pretty sure the family that you running for has lost like a family

figure and he's not coming back" so instantly it's like it like snapped me

out of it's like okay it's only for seven more hours I will get through this

and I always use perspective to get me through out of anything so I know for

any 100 miler or like this 214 mile I've got coming up well any race or any sort

of distance I have a training around a big one I always go "I'm pretty sure the

depression anxiety I went through all those years back is gonna make this so

much more easier" and it does! It's like almost a paradigm shift and I've

used it so many times that it seems to make and it's not even just with like

mental health struggles it's like a lot of events so I'm pretty sure the 24-hour

treadmill challenge is going to be hunting this and to make it a little

simpler it's like I'm pretty sure this 10k run is going to be easier than this

5k coming up but yeah this is when you get excited and you go and you can use

it to help you grow for example if you're in business and if you look at

someone like Elon Musk. He's the only guy alive in history that has three

companies that he started simultaneously he started about five or six in total

but he started three simultaneously Tesla, SpaceX, and Solar City and each of

those are worth a billion dollars in valuation so that's at least a billion

dollars in valuation now this was a few years ago now and has dramatically gone up.

If you grab that one billion times right there's three billion dollars so can I

start a company and have 1 million dollars in valuation one three

thousandth. Absolutely. It's the same comes down to Arnold Schwarzenegger. The

guy worked out 6 hours a day when he was training training for Mr. Olympia and if

he can train 6 hours a day surely I can train 1 hour and I look at like the top

ultra runners of the world if they can run hundreds of miles 300 miles at a

time it's like my idol Joe Desena, the guy ran the Vermont 100 miler,

the Badwater 135 - coined the toughest foot race in the world, and the Lake

Placid Ironman. He did this free wasn't 300 miles in one week and it's like hmm

surely I can do 100 K and that helps me deal with a lot by getting me out of

that rut and I've noticed that the poorest people in the world actually the

happiest or the most grateful I've traveled a lot and I've noticed in the

developing third-world countries, I remember was in the slums of Brazil I

came across a gentleman that was missing an arm and leg on but same side of his

body and invited me into his house and offered me food I'm like how is this guy

so poor and has nothing how is he offering me his stuff because he knows

what it feels like to have nothing and I don't think he wants to impede that and

anyone else so he's all about giving because he only cares about is food,

shelter, water, family. There's so many races I've done where you finish the

race and you go I don't care what food I have I just need food to replenish the

body. You don't care what car you have you just need a ride to get you home. And

you don't care about house you have as long there's a bed. And you're going to

pass that as soon as you hit that bed. There was even this one time where I

had to run for 70 mile my first experience running past 70 miles and it

was an event that had to go past midnight so you're running into the

night. Eight hours in heavily fatigued come across a bridge full of homeless

people and my first thought is that looks comfortable I think they were

sleeping a moldy thin cardboard boxes and my first thought is I wonder if they

can shoot over so I can have a quick snooze now that's pretty messed up to

think like a homeless person looks comfortable but I am just absolutely

grateful to have a bed and when you realize that people have had a pretty

badly it teaches you about empathy so perspective and empathy I almost have

a direct correlation. You go for myself who goes it when you do a marathon

or half marathon, 10k whatever the distance may be there's a time when

you're going to come across a mental block and you're using sheer will to get

out of it, and you're just in it you're in tunnel vision and you come across

someone you do come out of it miraculously whatever it takes to get

out but then you do come across someone else's going back through that as well

and your first thought is I always come across and it's like do you need a hand?

Do you need water? Do you need food? What do you need, man? and it's like empathy because

you were literally just in their shoes like no pun intended because it's a foot

race and I feel like I've noticed that for myself so I've learnt empathy and

perspective through endurance and that is what I had to talk about right now

because where this here I've spoken about all the core and the collision

pillars that it leads into the gold in the middle the practical resilience

which is the final the beauty the I'm going to wrap it up in that next video

and stay tuned please anyway have a great day guys and stay strong!

For more infomation >> PERSPECTIVE WILL GUIDE YOU IN THE RIGHT DIRECTION - Duration: 7:34.

-------------------------------------------

#4 (*NEW*) warframe 💀 challenge complete | skill up | tutorial | game play | guide | review (2018) - Duration: 14:52.

I mean actually I was taken at a carnival ready turn 12 it does obvious

it's a bad case community and the crash but again crushing the by

Padma motmot to rap because she gets it

our invasion

ha

well as a gas motor to to eat have a cast potable ice and each other got an

actual water down the action fortunately we apply automatic something

like that always there automatic mode versus you okay Pat's on a bar it up the

MA deuce purposes um trashy cane is a boon know what happens in a better area

policy it automatically against original educator anywhere ever that we excellent

short order some odds never come as a

pilot for we just have negative cash good effort to you NASA a canary J

montaner say we wash we could watch you know it is a

at 17 um so our export x of Karachi on a relic

neritic a cube bharata rajah the company knows

then we collect indonesian eq4 vision this is to Tammy Alexander

an artifact has been located proceed to the dig site void fissures

you need them to open a public but are you confident you can withstand their

carrie fisher's defend yourself and use reacted to open relics in assembly the

enemies are dropping reactant

Oh

you are going to need more reactants if you want to open that relic there's no

lack of I don't know it's good day and I just put up

without anybody they believe was okay

hola

excavator is ready to go keep it powered and protected from enemy fire

oh yeah

I mean it the jealousy excavator has lost power find another cell

go to the dig site

I can order it I just need to memorize

we just uncovered left to lose our reaction to open up

naturally all right an artifact has been located

proceed to the dig site and deployed protect via mobile it extracts the

artifact

the excavator has run out of power

I mean Sean Hannity's need to drop the

estimates it's a little past life

that's it you open the relevant finish your mission and we'll take a look

excavator is ready to go keep it powered and protect it from

enemy fire in the Gulf Olympic unity Wow nice this scanner has picked up a

target go to the dig site

we need another Power Cell for the excavator excavator deployed protect the

unit while it extracts the artifact

config' your hardwork has just been rewarded extraction is now available

Wow activated in Genesis our own niger river near ionia no general

turbomachinery arrow after a helicopter they are effective you want a

refrigerator

helicopter sir all right sir cool soft janessa it already

you know you're entitled to say it's

extra Tech's the remaining dig sites regular black

they're back

go to the

excavation complete look what we found

For more infomation >> #4 (*NEW*) warframe 💀 challenge complete | skill up | tutorial | game play | guide | review (2018) - Duration: 14:52.

-------------------------------------------

FYB-SG Bitcoin Exchange Guide - Duration: 14:32.

Hello and welcome to this tutorial.

Today we're going to walk through

how to use FYBSG.com, the online bitcoin exchange,

to buy and sell bitcoin.

In other words, how to trade.

This is FYBSG.com's homepage

So here you'll find any announcements,

And on the top of the page always is the navigating ribbon

which makes navigating and using the site

really simple and easy

To get started for the first time

you'll need to register an account.

You can click here or here

This would bring you to the registration page

where all you need is your email address

and then here you will make up a password

for your FYBSG account

I'm going to use my outlook account

and we're going to make up a password...

There are some rules - these are just standard rules

that you'll see almost everywhere now -

Password needs to be at least eight characters long,

cointain an upper case and a lower case character,

and a digit; it needs a number.

Just for your own security

passwords should not be the same as any other email password

or any other account password that you have.

Once we have the password typed in twice

you can go ahead and click submit.

After submitting, you will receive an email

with instruction on how to complete your registration.

Typically an email will just take a few minutes for your mailbox to receive.

If you havent gotten an email within 10 minutes,

do check your junkmail folder.

Let check our email...

...and there we have a verification email.

So what you want to do is

copy this verification code

and then click on the link.

That would bring us to the verification page

You'd type in your email address

and then paste in that verification code

and then click verify.

In order to access the full website,

we need to comply with MAS regulations, in which

FYBSG needs proof of our identity and our address.

We can submit those documents when we click on Verify Account.

You'll need to submit your name, NRIC or Passport number, Address, Contact number,

Date of birth, and Nationality.

You will also need to submit files or documents which verify this information.

Here you can click to choose the file from your computer

or you can actually drag and drop the file onto the button.

One file must be a photo ID

such as a scan or photo of your NRIC or passport

and the next document must show proof of your address.

This could be an official letter mailed to your address, with your name on it

such as a utility bill, a bank statement, or the back of your NRIC

if you are Singaporean or a PR.

The back of an employment pass is not sufficient

because it does not include your address.

You'll have to make sure that your

file sizes are 250 kilobytes or less

Or else the system will not accept them.

To resize an image, you can follow this quick tutorial.

So, we'll want to open our file with Microsoft paint.

We could also choose to open Microsoft paint first

And then choose our scanned NRIC file

from the file tab open command.

Use the Select tool to draw a rectangle around the IC image

and then click Crop.

This will get rid of all the white space around scanned IC.

FYBSG requires that documents be kept to a size of 250 kilobytes or less

so we'll probably need to resize the image so its a smaller file size.

To do this, click resize.

Make sure the resize by percentage option is selected,

and then type in the percentage amount your image will need to be resized by.

You'll see immediately that the image shrinks.

Save the file using SaveAs

and choose a different name such as "Front Smaller".

Use the same steps for the back of the IC.

Use the Select tool, draw around the card, and click crop,

Then click Resize, type in a number such as 75%,

hit Ok, and then SaveAs

And type a new name.

Make sure the file type chosen is JPEG.

Here we can see that our new file sizes are smaller than they used to be.

So I'm just going to drag and drop these files

Front and back, onto the buttons.

And then hit Submit.

Once you've submitted these items,

you just need to wait, typically just one business day

and the company will verify that you are indeed a real person

and then your account will be fully functional!

And you can start to buy and sell your own bitcoins.

Whenever you're logged in, you will see here your balance:

How much bitcoin you have and how much Sing Dollar you have

with the exchange which you can use to trade.

So when you're just starting out of course these will both read zero.

So to start buying bitcoin, you'll have to deposit Sing Dollar into our FYBSG account.

To start with, click into the Deposit page.

To deposit Sing Dollar, you'll just use the usual standard steps

that you use to transfer funds from one bank account to another

In this case, from your bank account

to FYBSG's company back account.

Here you will see FYBSG's bank account address and details, and -

- This is REALLY IMPORTANT -

- Your FYB Code.

This is your own, unique code that FYBSG uses to identify your account.

You MUST include your FYB Code with your deposit; Its the Only way that the company will know that it was you.

On the deposit page you'll find some helpful screenshots

of several of the most common banks'

fund transfer forms,

and where on those forms you should type

your own unique Code.

So this is usually in the "Comments" section,

Or in the "My Initials" section,

Or a "Description" section.

So Copy your FYB Code,

and log in to your internet banking

And make the fund transfer to FYBSG's bank account.

You HAVE to include your FYB Code with every deposit you make because

thats how FYBSG will know to credit Your account with Your deposit.

If you have bitcoin in your own wallet that you want to trade with,

You can deposit the bitcoin into this deposit address

which is unique to your account

and found on the deposit page.

Your bitcoin will be deposited to your account after three confirmations.

Singapore Dollar deposits take one business day.

After one business day or three confirmations,

You will see that your account balance would have increased by however much you deposited.

OK, so we've got Sing Dollar in our account, and now we want to start buying bitcoin with it.

We'll click into the Trade Page.

On the Trade page you will see a realtime chart of the price of bitcoin being bought and sold on the exchange.

The chart dates all the way back to when the exchange was founded in 2013.

you can click and drag to see previous dates

and you can also adjust some preferences here

For example instead of a weekly view, we can see an hourly view of all the transactions.

Below the trade chart you'll see the Order Form.

The Order Form begins by telling us how much available bitcoin we have in our account

and how much available Sing Dollar we have in our account.

It then goes on to ask us the quantity of bitcoin we would like to buy or sell,

and then at what price we want to make this transaction.

We either use the sell side of the form, or the buy side of the form.

The current market prices are shown in grey.

These are just a guide to help us gauge where we want to set our price at.

So let's say I want to buy bitcoin

and I've got this amount of Sing Dollar in my account.

If I wanted to buy all the bitcoin I could with my available Sing Dollars,

At this market price,

I would just have to click Buy All.

And the Order Form is automatically filled out

and we can see theres a breakdown here of

how much I would be spending and how much bitcoin I would be getting for that price.

Orders at the market rate are instant

However, if we were to set a lower price,

Then the order will become a Pending Order

and we would have to wait for the market to reach our price

before the order is filled.

Let's say I want to buy at $12001 (Singapore Dollars)

We can check in real time how much out transactions will cost us

This is really helpful so you can really hone in on how much bitcoin you want to buy or sell.

OK we're going to go with spending S$1000 Dollars,

at the price of S$12001 Singapore Dollars per bitcoin.

If we are happy with that we just click Buy BTC.

The page will refresh, and down below you'll see that

because my order was lower than the market rate, my order became a Pending Order.

So, I am waiting for it to be filled.

However, if I had used the market rate, the order would be filled instantly.

Here we see all kinds of other details: the Ticket Number, the price, the quantity ordered, the date and time created,

and here we have the option to cancel at any time before the transaction is filled.

We can check on our order in the Order Book.

The Order Book lists all the Buy and Sell orders that are currently pending on the exchange.

Each order is an actual order made by an actual person, hoping to sell or buy their bitcoins

at a price that they set themselves.

Because FYBSG is an online bitcoin Exchange, not just a bitcoin selling site,

You will be trading Sing Dollars and Bitcoin with real people-

with all the other users of the site who want to buy or sell.

So FYBSG is really an exchange market; it doesn't set any of the prices.

The market decides freely and purely what the price of bitcoin is and should be.

Buy Orders are listed highest price to lowest, and Sell Orders are listed lowest to highest.

And next to each order is the amount of bitcoin being put up for sale,

or being sought to be bought.

So we can go and find our order...

Here it is.

That means we'll have to wait for these orders to be filled

before its our turn.

This shows the buy orders in green and the sell orders in red.

When a buy order price matches a sell order price, then a sale is made

and depending on how much bitcoin was listed,

for that transaction,

the order may be completely filled, or it may be Partially Filled.

This means, if I'm looking to buy bitcoin,

a Partial Fill occurs when the seller who matches my price has put up less bitcoin than I was wanting to buy.

In that cases, the system would buy for me as much bitcoin that that seller had put up for sale,

and my order would be updated as Partially Filled

until another seller matches my price, and so on.

The same applies the other way around.

If I was selling bitcoin instead,

and a buyer matched my price but only wanted to buy less bitcoin than I had put up for sale,

they would buy the amount that they could, and I would have a Partially Filled Pending Order.

And I would await the next buyer, and so on.

We can check our past orders on the Order History page.

Here you'll have a summary of the various orders

that we've made, and cancelled, and

which are Partially Filled, etc.

We hope this tutorial has been useful

Follow these four steps and you'll be all set and

Ready to trade Bitcoin.

For more infomation >> FYB-SG Bitcoin Exchange Guide - Duration: 14:32.

-------------------------------------------

Jakarta Kota Tua Walking Tour ( Jakarta Good Guide ) - Duration: 3:41.

Jakarta Kota Train Station

Other name: Beos Station

The Oldest & Biggest Train Station in Jakarta

Sunda Kelapa port

Trading port since 12th century

Docking area for Phinisi boat

Syahbandar tower

Kilometer Zero of Jakarta

Site to monitor ship traffic

VOC Shipyard

Built in 1628

Restored in 1998

Used for Dutch ships

This used to be a warehouse

Now it's being used for a music school

So its nickname is Voice Of Culture

Intan Bridge

The oldest suspension bridge in Indonesia

Other name: Chicken market bridge

There used to be a chicken market here

The market sold organic chicken

Connecting Dutch and British territories

Center of Jakarta old town

Other name: Stadhuisplein

You must take a picture here

because this governor office is very iconic

There used to be a water fountain to drink here

Resembles Amsterdam Square

Olven building

Built in 1922

Life insurance building in Dutch time

Now it's Cafe Semasa

Không có nhận xét nào:

Đăng nhận xét