Just rub the candy cane across his tongue until the red stripes come off
-------------------------------------------
OSRS doric's quest quick guide - Duration: 2:39.
First off go talk to Doric who is located in the tiny hut North-West of Falador, and he will tell you that to use his anvils he wants 6 Clay, 4 Copper ore, and 2 Iron ore. If you do not have a pickaxe, Doric will give you a Bronze pickaxe.
Walk over to the northern entrance of the Dwarven Mines which is located at the Ice Mountain northeast of Falador or use the staircase entrance east of the Party Room.
Once you get down there, on the west side of the mine you'll find some iron and copper rocks. Mine 2 Iron ore and 4 Copper ore from them. Then go south a little bit more and you will see some clay rocks. Mine 6 of these (see map below).
Now you have your 6 Clay, 4 Copper ore, and 2 Iron ore in your inventory. Return to Doric and give him the ores, he will appreciate it very much.
-------------------------------------------
DATING THAI GIRL on TINDER and BEING her GUIDE in BANGKOK - Duration: 7:52.
Tinder girl !
Tinder ?
You tinder girl, right ?
And what ?
And today i'm your tour guide for Bangkok
She's a tourist here
She is a thai but she is a tourist
And i'm a pro for Bangkok
-------------------------------------------
PUBG ULTIMATE SNIPER RIFLE GUIDE!!! - Duration: 3:13. For more infomation >> PUBG ULTIMATE SNIPER RIFLE GUIDE!!! - Duration: 3:13.
 -------------------------------------------
Vlog: Dubai travel guide: Musandam Dibba Tour | Croaziera pe ocean, in Oman! - Duration: 10:15.
Hello internation!
What's up?
If you're wondering what's wrong with this face,
well, don't worry, it's just my face,
but now it's 06:30 in the morning
and I started this vlog from Dubai
from this hour, because I'm going on a Dhow cruise
and for that reason I had to wake up at 06 o'clock
Now I'm in the metro, I'm going to Burjuman station, from where I'll be pick up
and go to the ocean.
So, this vlog will be amazing,
again,
because I'm in Dubai,
and everything I do here, it's amazing!
After a three hours trip, by bus,
I, finally, arrived in Oman
Yes, I'm not anymore in UAE, I'm in Oman!
I crossed the border, very easy, with my passport
and now I'm in the harbour
and get ready to board on the Dhow vessel.
It's 11 o'clock
and the cruise it's about to start.
Let's see how it will be!
I'm still sleepy,
I have try to sleep a little beat
I did not succeed
but I hope to be better after I swim in the ocean.
I see that are some waves
the wind blows slightly
is quite chill
So, I'm going to refresh right away, and we'll start the fun!
I arrived on the boat
finally
Will begin a 6 hours, Dhow cruise
And during this time we will have a lot of activities!
But, until then, I need to drink a coffee, because I'm thirsty and sleepy!
After I'm charged with energy
we'll go further!
We started the cruise!
And we have speed!
The first snorkeling from my life,
was great!!
But the banana ride was even better!
I lost a swim slipper, now I have only one.
But what a feeling!
I want to say thank you, to ZA Tourist,
who loaned me his camera (SJCAM SJ5000)
So can I shoot underwater.
I hope that the underwater shoots are good,
because, otherwise, he will kill me!
But, one more time, ZA Tourist, I want to thank you for your help
and you can take a look on his channel
to see where he travel
and what he's doing
because he does good too
like all of us!
I'm tired!
It's lunch time!
This is what I choosed. Its buffet and you can eat what you want
We have indian food,
just how I like it!
So, let's have a good appetite!
I have finished eating,
I'm full,
I ate too much, as usual,
very good indian food,
and now I'm making my siesta,
I relax,
listening to good music...
I'm all wet,
but I do not care!
I recovered my swim slipper!
I saw him floating on the water, jumped, and took him!
I always take what's mine!
On the lower deck, music plays, people dancing, are having fun,
so, I'm going to the party!
Everything that's beautiful must end!
This extraordinary experience is over!
It was great!
I have lot of fun!
I did snorkeling for the first time in my life!
I jumped out of the boat to get my swim slipper, just before departure!
So, it all ended well!
I felt really good!
I recommend that you do not come to such a cruise if you have seasick!
Because you have seen how it was on the ocean, the waves and all...
But, if you don't have seasick, then you must do such a cruise!
I was in this tour with the guys from Musandam Sands Tour
and it was all good and great!
I think you hear the call to prayer, in the background
So, I leave the people to pray
and stop the vlog right now.
I kiss you and we'll see you next time!
All this fun
it only cost me 125 aed!
-------------------------------------------
Italy | Battle cats (Strategy Guide) (Turn On English Subtitles) (Read Description) - Duration: 5:42.
Hello to the strategy guide on how to beat Italy Empire of cats Chapter 1
Start this stage by upgrading your Worker Cat (the icon on the bottom left)
Wait for the hippo (Hippoe) to cross the halfway mark
Don't forget to keep upgrading your Worker Cat
Spawn a Tank Cat once the Hippoe reaches the halfway mark
Once the Tank Cat dies, spawn another Tank Cat
Once the second Tank Cat dies, spawn a Gross Cat and Tank Cat
Don't forget to upgrade Worker Cat
Right After Spawning a Tank Cat and Gross Cat, spam (spawn a lot of) Tank Cats and keep spamming
Once the Hippoe dies, upgrade Worker Cat until it reaches MAX
Once the penguin (Jackie Peng) arrives to your cats, spam (spawn a lot of) Macho Cats, Tank Cats and Axe Cats and keep spamming
Once the penguin (Jackie Peng) dies, spawn Lizard Cat, and spam Macho cats, Tank Cats and Axe Cats
Keep spamming Macho Cats, Tank Cats and Axe Cats to serve as meatshields
Once you see the Hippoe attacking your meatshields, spawn a Cow Cat
Spawn another Lizard Cat
Don't forget to keep spamming those meatshields
Fire the Cat Cannon (icon on bottom right) once you advanced to the base
Keep spamming meatshields
Thank you for watching! I hope this helped you. Like and comment how I can improve.
-------------------------------------------
Ruins of Nalanda | Complete History | Guide | World Heritage Site | Nalanda, Bihar, India - Duration: 5:05.
In Takshila, children of Kings used to study
while
Nalanda was for poor and intelligent students.
When the University was active
the area was 10 km long and 5 km wide.
At that time,
There was 108 hostels
and 108 subjects were taught.
There were 52 ponds and 53 wells.
There were also 3 huge libraries.
They were: Ratnasagar, Ranthranjika and Ratnadhi
Ratnasagar was of 9 storeys.
And the rest two were of 6 storeys each.
-------------------------------------------
Battle for the Ear: Beginner Guide - Midi Software - Duration: 7:38.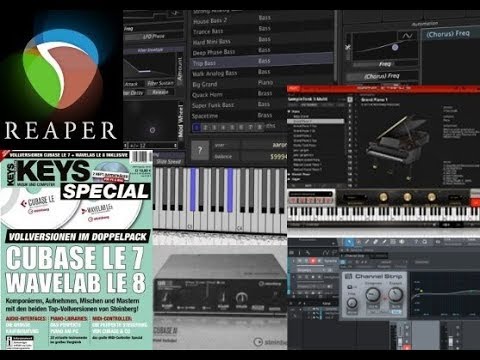
Welcome back to Battle for the Ear! For the current occasion again so
a bit of my tips and recommendations for midi recording
and maybe your first entry with a DAW.
If you play a Midi Keyboard
you want a solution, where you
can edit notes and maybe also have got access to
new free instruments. There is really a very big range
of free versions such as Studio One Prime to use. There you have to
create an account and log in there,
download it all and then activate that needs
always 1-2 hours of effort. That's why Reaper is my
first recommendation, to see briefly, okay, how is that one?
Can I deal with a DAW? Can I handle it or is it
somehow uninspiring? So you maybe play along
piano or guitar. Therefor my recommendation would be Reaper,
because that's really intuitive. That may not be so visual
designed, but really somehow rather a bit on the
essential functions. But that can also be an advantage
for beginners. So take a look at this: that is
available for Windows and Mac, 32 or 64
Bit - as you like. It is also a very small file to download.
11 megabytes is that and you can install and start it immediately. So you
do not need to activate it first. Instead, you get just such a little info:
That it is now the test phase and you have to do it again for a few seconds
wait until you can skip this
window in the foreground. It is no biggie, because if you
first record one or two songs Maybe that's what it is.
But what step did we skip?
If you want to make proper audio recording,
you always need an interface, which is now a plug and play
Interface or an interface with certain drivers.
Use ASIO for Windows compatible programs. Of course, if you only have midi notes
want to play then of course
just a proper midi keyboard and a driver that handles
Recording and playback simultaneously is fine. This would be ASIO4all for Windows now and that is
also a free driver. So now we have one -
Reaper - there are already a few small instruments like drums and synth, and
a sample player where you can easily load an audio sample.
Audio samples are also found like sand by the sea.
then you should just look on platforms
like Bonedo or delamar. In order to first of all, as a beginner
reasonable content download without viruses.
So there are a lot of possibilities to expand Reaper,
polish up your instruments,
then you look for example on delamar - they have this one now
SC Infinity as a recommendation presented and it is also free.
Yes, you just have to install.
it downloads the individual sounds. then. Of course you can also find
a lot of classic VST1 instruments.
for example on VST4free. There are all these files you
can download and then copy to your VST folder purely
BTW a user asking
gave me the idea for this video.
He noted that he used Sampletank back then. Found it cool and there is
nowadays again from IK multimedia the current 64 bit version - that is now
Sampletank 3 and there is just that customshop where you can get a free
version. so you can easily sign up with your account and
know how it works. then look at free products and can download sampletank 3 free and then the content.
There is even more than this - for example the free content of Sampletank 2.5
I'll just be the first one downloaded.
because there are so many cool Instruments, drums
strings or synthesizer sounds.
Also nice with sampletank that
there are different modules you can get can add - standard effects like
EQ, reverb and so on! And yes there is
also the possibility to use the instrument as a host and
then link the sixteen midi channels with different instruments.
Of course that is not easy for beginners
That's why you should first select only one proper sound first.
So insert an instance of sampletank and then just looking for a sound, with
you can start something. Now for for example a piano sound. There is that
Grand piano sound that is always there. there you have to
do not even download extra content.
this is a piano that can
be adjusted a bit, whether that should rather sound crisp
or a bit dull and in the stereo width and so on. So yes I think so
really great for free!
That's enough for now a bit as a little insight!
If you say so now maybe Reaper is still not so clear that you feel like:
Okay Cubase or those slimmed down
versions could be nice! There are eight instrument slots,
at least 24 to 48 audio tracks and that is yes actually so
Interface always free. It but also gives the opportunity to yourself
to buy a magazine or a "journal". There is
then often such a version too Example now with the KEYS or the
BEAT magazine. There is the possibility with to look at eBay - there the
Publisher has a eBay shop or other stores have it still in stock and you can buy Cubase
7, 8 or 9 LE brandnew for 10 to 15 euros
and as I said, I am a Cubase user I like the program, I think so
intuitive. It's easy but for beginners the only difficulty is that
you have to activate the whole thing again. So you should
try out Reaper or otherwise Studio One Prime. And if you stop there
because you can't load external VST instruments
but only use the internal sounds and SF, maybe
then look again, if you can get a cheap Cubase version that brings or
if you want to get an audio interface for 50 to 100 euros
Well that's it now I wish you a lot of fun
with free trial and error!
-------------------------------------------
FINCLIP_Quick Start Guide - Duration: 6:35.
(1) Unscrew the cursor stop.
(2) and remove the cursor.
(3) Using a small flat-tip screwdriver, open the cursor to free the curved elastic protector.
(4) Remove the buckle or bungee on your fin
(5) Adjust the clamp hinge setting as per the thickness of you fins: A1 fins with a thickness of < 15mm;
(5) Adjust the clamp hinge setting as per the thickness of you fins: B1 fins with a thickness of > 15mm (e.g. Scubapro Seawing Nova).
(A1) Loosen the Allen head bolts on the underside side of the clamp with a Allen key
(A2) to allow the back of your fin to be fully inserted inside the clamp.
(A3) Tighten the 2 Allen head bolts on the underside of the clamp to secure firmly, without over-tightening.
(A4) Loosen the Allen bolts with a M3 Allen key on the adjustable sliding heelpiece plate on the topside of the clamp until it slides freely.
(A6) Put on your diving boots (or simulate the presence of your foot by stuffing them with something) and slide the boot into the fin. This will allow you to find the correct positioning of the heelpiece.
(A7) Raise the heelpiece (A7).
(A8) and adjust the adjustable sliding heelpiece plate to find the correct closed position for your foot.
(A9) Remove the boot carefully, without changing the position of the heelpiece.
(A10) Tighten the two adjustment plate Allen head bolts on the topside of the clamp to secure the position of the heelpiece.
(A11) Gently press the curved elastic protector over the centre of the Finclip elastic
(A12) and close it inside the cursor. Press the cursor until you hear it click into place (A12).
(A13) Reposition the cursor in the heelpiece track making sure that the cursor clamp is facing upwards.
(A14) Tighten the cursor stop screws.
(A15) With a small flat-tip screwdriver, gently lever open the rear tabs on the two side connector covers.
(A16) Attach both of the side connector covers to the rigid supports on your fin.
(A17) and connect the hooks located at each end of the elastic to one of the three available positions.
(A18) The choice of position depends on how tight you want the elastic to be.
(A19) Close the covers by first positioning the two front tabs and then closing until you hear the rear tab click into place.
(A20) Always try out on dry land a few times to learn the right doning and doffing technique.
(B1) Completely remove the Allen head bolts on the clamp and adjustable sliding heelpiece plate. .
(B2) Hold the topside of the clamp firmly, slide the adjustable heelpiece plate all the way back,
(B3) and then twist slightly to completely remove it from the clamp (B4).
(B5) by pressing in the direction of the arrows,
(B6) move the pins, one at a time, from hole A to Hole B (B7).
(B5) by pressing in the direction of the arrows,
(B6) move the pins, one at a time, from hole A to Hole B (B7).
(B8) Place the adjustable sliding heel plate back in its original position on the clamp.
(B9) Place the Allen head bolts back in their original position, making sure that the ridged side of the adjustable sliding heelpiece plate bolts are positioned on the underside of the clamp.
(B10) Replace the clamp screws with M5x20 screws (see illustr. 9 on the exploded view) and follow the instructions from (A2).
Không có nhận xét nào:
Đăng nhận xét